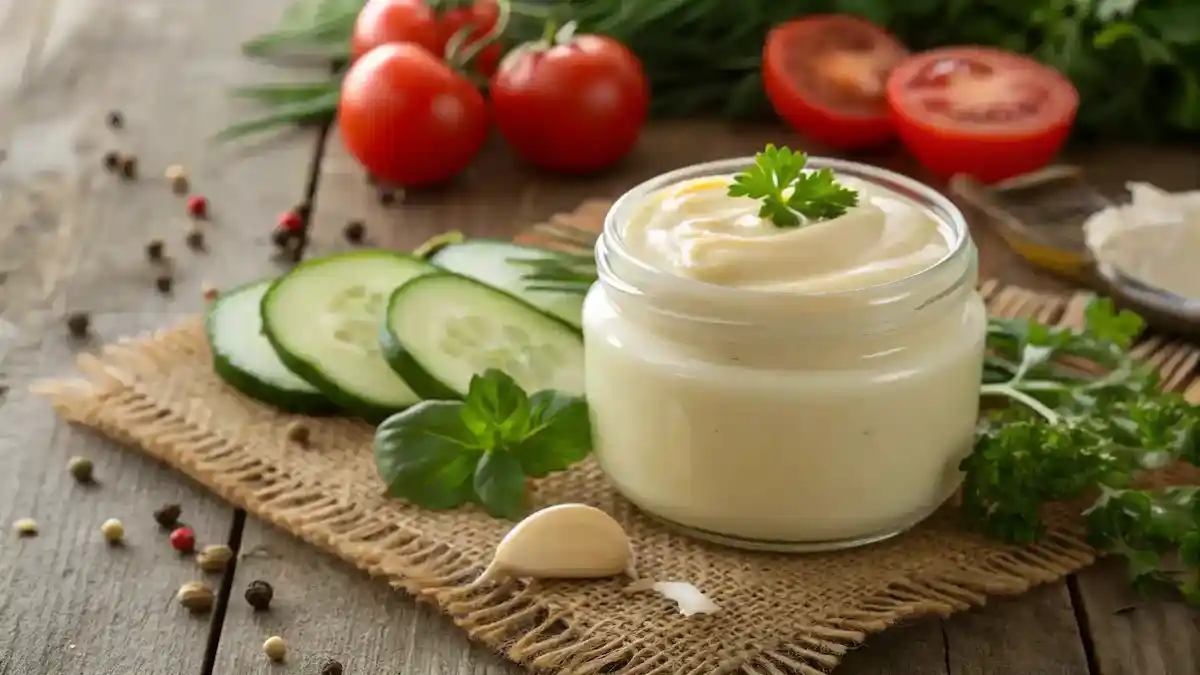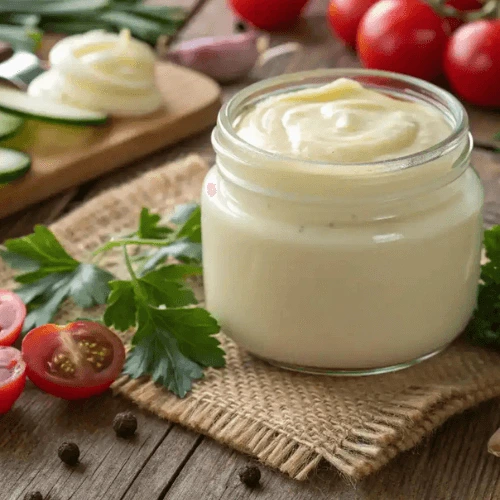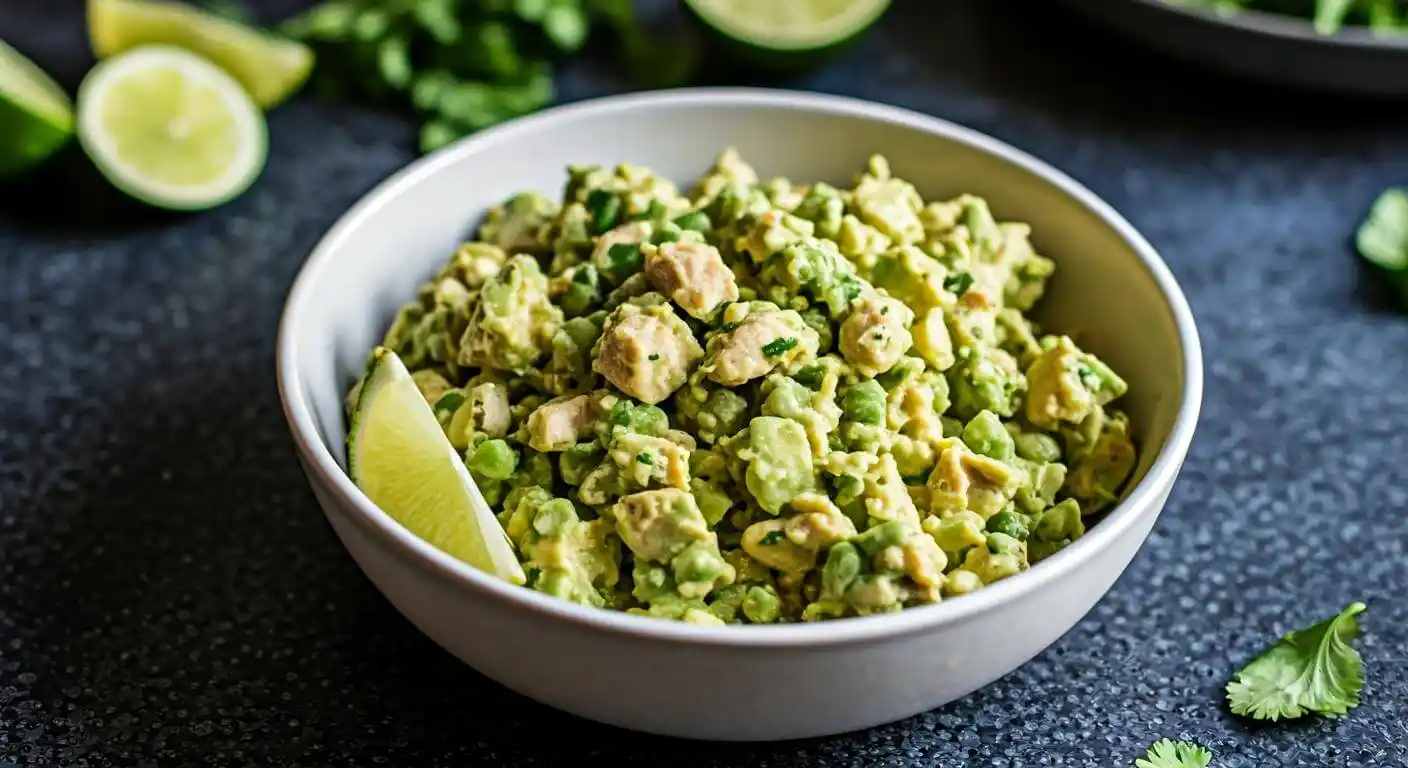
Keto Avocado Chicken Salad is a creamy, dreamy delight that will tantalize your taste buds! Imagine tender, juicy chicken mingling with ripe, buttery avocados, all tossed together in a zesty lime dressing that dances on your palate. This vibrant salad is not just a feast for the eyes; it’s packed with healthy fats and protein, making it the perfect low-carb meal. Whether you’re enjoying it for lunch or as a light dinner, each bite is a celebration of freshness and flavor that will leave you craving more. Dive in and savor the goodness!
Packed with healthy fats and fiber, avocados are linked to many health benefits including heart health and improved satiety.
Why You’ll Love This Recipe
- It’s a creamy, dreamy delight packed with healthy fats.
- Perfect for meal prep enjoy it all week long!
- Quick to whip up, making busy days a breeze.
- Low-carb and keto-friendly, keeping your goals on track.
- Customizable with your favorite veggies for extra crunch!
Keto Avocado Chicken Salad
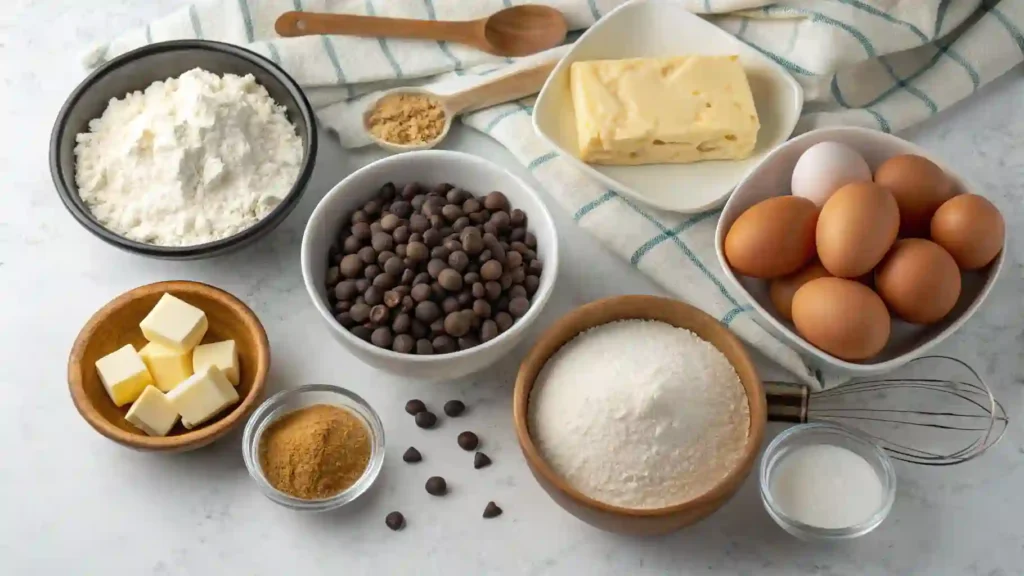
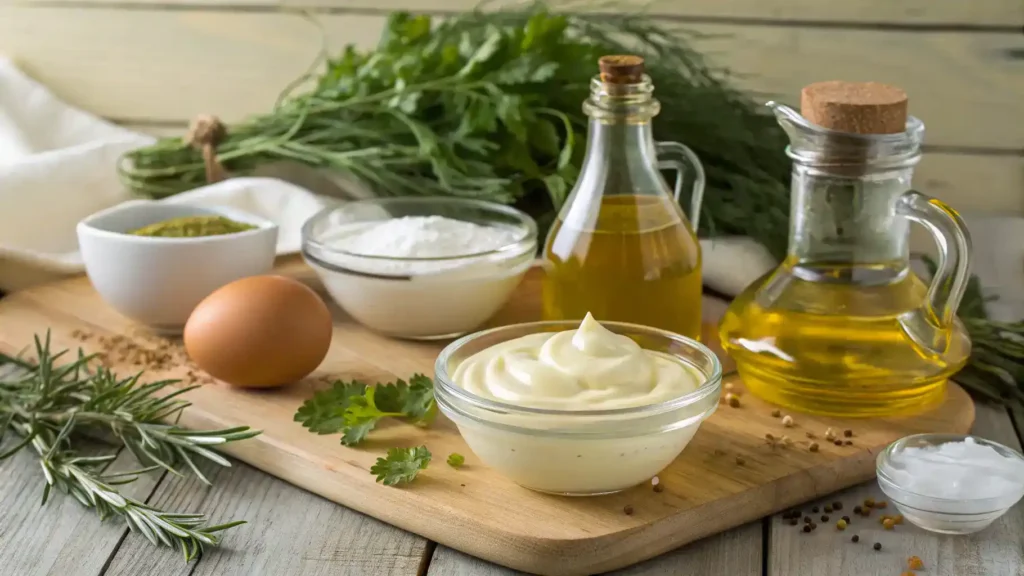
Ingredients
Method
- Collect 2 cups of cooked chicken, 1 ripe avocado, 1/4 cup of diced red onion, 1/4 cup of chopped cilantro, 1/2 cup of diced cucumber, juice of 1 lime, salt, and pepper.
- If you haven’t already, cook your chicken. You can grill, bake, or poach it. Let it cool, then shred or chop it into bite-sized pieces.
- In a mixing bowl, scoop out the ripe avocado. Use a fork to mash it until creamy, but leave some chunks for texture.
- Add the diced red onion, chopped cilantro, and diced cucumber to the mashed avocado. Stir gently to combine.
- Fold the shredded chicken into the avocado mixture. Be gentle to keep the avocado creamy.
- Squeeze the lime juice over the salad. Sprinkle with salt and pepper to taste. Mix well to ensure everything is coated.
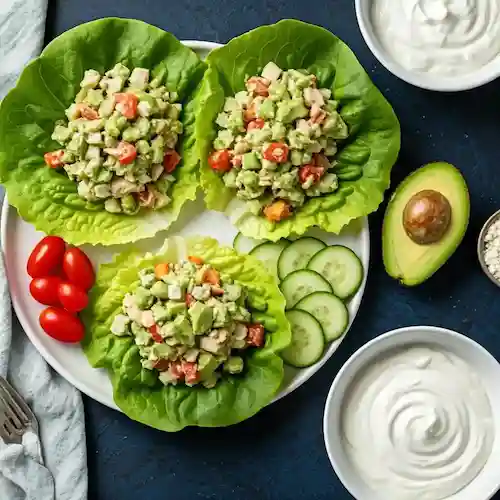
- For the best flavor, let the salad chill in the fridge for about 30 minutes. Serve it on a bed of greens or in lettuce wraps!
Recipe Snapshot
| Feature | Details |
|---|---|
| Category: | Salad |
| Cuisine: | American |
| Prep Time: | 15 minutes |
| Cook Time: | 0 minutes |
| Total Time: | 15 minutes |
| Dietary: | Keto, Low-Carb |
| Serves: | 4 |
| Best Served: | Chilled |
Ingredients
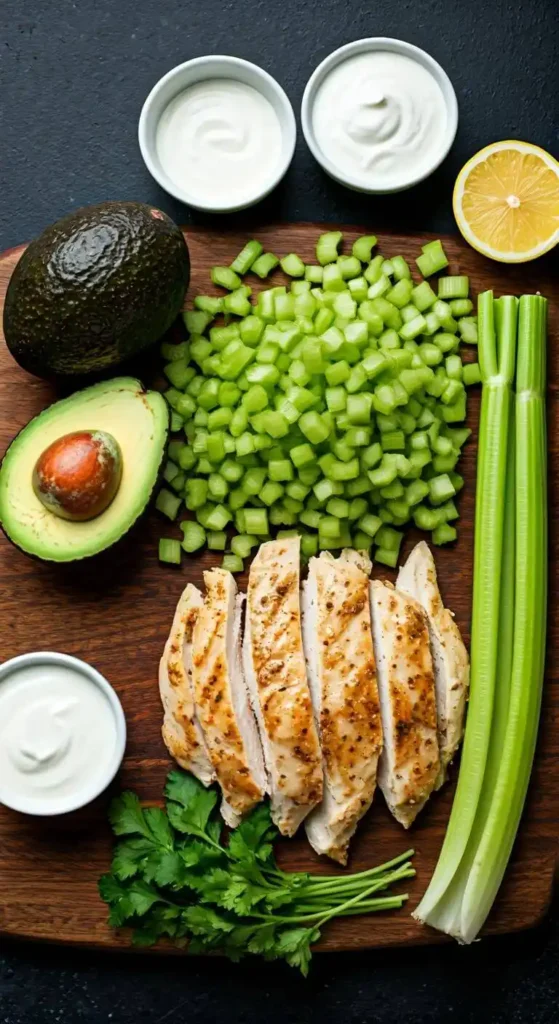
- Cooked Chicken Breast – a lean protein that keeps the salad hearty and satisfying.
- Avocado – adds creaminess and healthy fats, perfect for a keto diet.
- Greek Yogurt – a great substitute for mayonnaise, adding creaminess and probiotics.
- Celery – provides a nice crunch and freshness to the salad.
- Red Onion – adds a zesty flavor that complements the other ingredients.
- Lemon Juice – brightens the dish and helps prevent avocado from browning.
- Salt – enhances the flavors of all the ingredients.
- Black Pepper – adds a touch of spice to the salad.
- Fresh Herbs (like cilantro or parsley) – brings freshness and a burst of flavor.
Ingredients with measurements will be right under the article in the recipe card.
How to Make the Recipe
Get ready to whip up a delicious Keto Avocado Chicken Salad! Follow these simple steps for a delightful meal.
Step 1: Gather Your Ingredients
Collect 2 cups of cooked chicken, 1 ripe avocado, 1/4 cup of diced red onion, 1/4 cup of chopped cilantro, 1/2 cup of diced cucumber, juice of 1 lime, salt, and pepper.
Step 2: Prepare the Chicken
If you haven’t already, cook your chicken. You can grill, bake, or poach it. Let it cool, then shred or chop it into bite-sized pieces.
Step 3: Mash the Avocado
In a mixing bowl, scoop out the ripe avocado. Use a fork to mash it until creamy, but leave some chunks for texture.
Step 4: Mix in the Veggies
Add the diced red onion, chopped cilantro, and diced cucumber to the mashed avocado. Stir gently to combine.
Step 5: Combine with Chicken
Fold the shredded chicken into the avocado mixture. Be gentle to keep the avocado creamy.
Step 6: Season It Up
Squeeze the lime juice over the salad. Sprinkle with salt and pepper to taste. Mix well to ensure everything is coated.
Step 7: Chill and Serve
For the best flavor, let the salad chill in the fridge for about 30 minutes. Serve it on a bed of greens or in lettuce wraps!
Pro Tips for Making the Recipe
• Use ripe avocados for a creamy texture and rich flavor.
• Shred the chicken for better distribution of flavors throughout the salad.
• Add a squeeze of lime juice to keep the avocado fresh and vibrant.
• Experiment with herbs like cilantro or dill for an extra flavor boost.
• Serve chilled for a refreshing meal on warm days.
How to Serve
- Serve chilled on a bed of mixed greens for a refreshing lunch.
- Wrap it in lettuce leaves for a low-carb, crunchy bite.
- Pair with sliced cucumbers and cherry tomatoes for a colorful platter.
- Top with a sprinkle of feta cheese for an extra flavor boost.
- Enjoy with a side of homemade keto-friendly crackers.
- Use as a filling for avocado halves for a fun presentation.
- Serve with a dollop of Greek yogurt for creaminess.
- Accompany with a zesty lemon vinaigrette for added zing.
Make Ahead and Storage
Proper storage ensures your Keto Avocado Chicken Salad stays fresh and delicious!
Storing Leftovers
• Allow the salad to cool completely before storing.
• Use an airtight container for best results.
• Store in the refrigerator for up to 3 days.
• Keep avocado separate if possible to prevent browning.
Freezing
• Portion the salad into individual servings.
• Use freezer-safe containers or bags.
• Remove as much air as possible to prevent freezer burn.
• Freeze for up to 2 months for optimal quality.
Reheating
• Thaw in the refrigerator overnight before reheating.
• Use a microwave-safe dish for quick reheating.
• Heat in short intervals to avoid overcooking.
• Stir gently to maintain texture and flavor.
FAQs
What can I use instead of mayonnaise in the Keto Avocado Chicken Salad?
If you’re looking for a healthier alternative to mayonnaise, consider using Greek yogurt or a blend of mashed avocado and olive oil. Both options will keep your salad creamy while adding extra nutrients!
Can I add other vegetables to the salad?
Absolutely! Feel free to toss in your favorite low-carb vegetables like cucumbers, bell peppers, or celery. They will add crunch and freshness to your Keto Avocado Chicken Salad.
How can I store leftovers of the Keto Avocado Chicken Salad?
To keep your salad fresh, store it in an airtight container in the refrigerator. It’s best enjoyed within 1-2 days, as the avocado may brown over time.
Can I make this salad ahead of time?
Yes, you can prepare the chicken and chop the vegetables in advance. Just mix everything together right before serving to maintain the freshness of the avocado!
Final Thoughts
So there you have it your new favorite dish, Keto Avocado Chicken Salad! It’s simple, delicious, and oh-so-rewarding. Picture yourself savoring each bite, feeling good about your healthy choice. Whether it’s a quick lunch or a delightful dinner, this salad is sure to bring a smile to your face. Dive in, enjoy, and don’t forget to share the joy with friends and family!