Imagine sinking your fork into layers of tender, creamy potatoes enveloped in a rich, velvety cheese sauce that oozes with every bite. This Cheesy Scalloped Potatoes Supreme is like a warm hug on a chilly day, with hints of garlic and a sprinkle of nutmeg that dance on your palate. Topped with a golden, crispy crust, it’s the perfect blend of comfort and indulgence. Whether it’s a cozy family dinner or a festive gathering, this dish will have everyone coming back for seconds, savoring the delightful aroma that fills your kitchen!
Why You’ll Love This Recipe
- Trust me, you’re going to love this creamy, cheesy goodness!
- This one’s a game-changer for your comfort food cravings.
- Perfectly layered potatoes that melt in your mouth.
- Easy to make and even easier to devour!
- Great for family gatherings or cozy nights in.
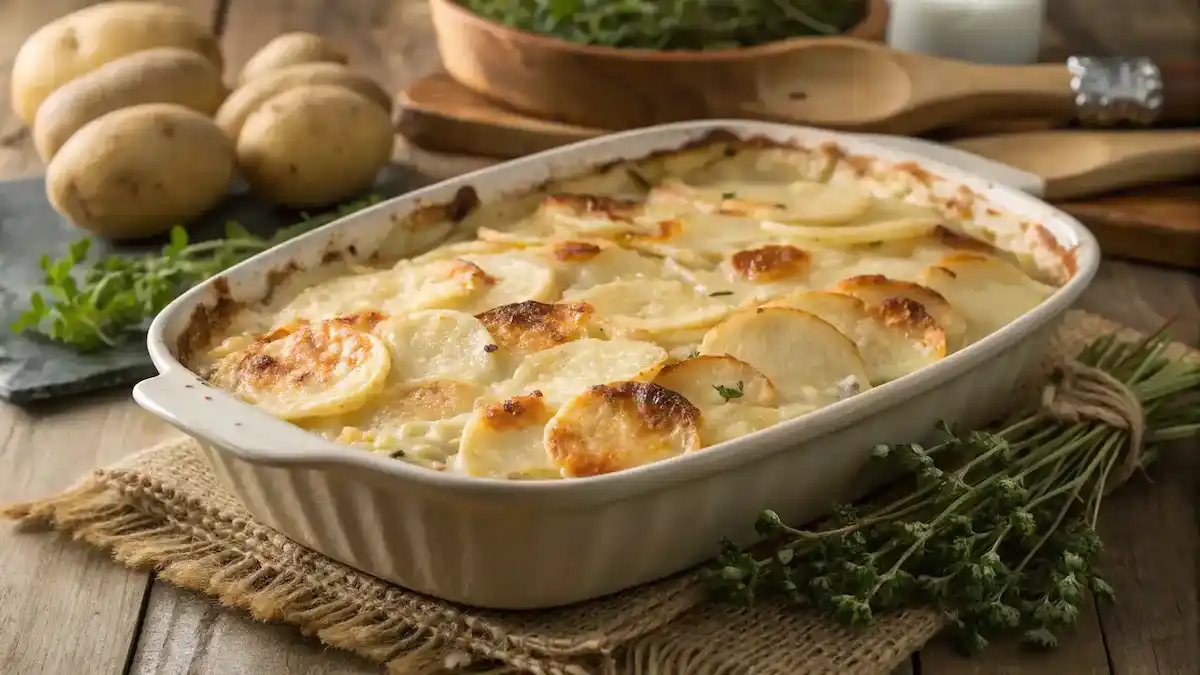
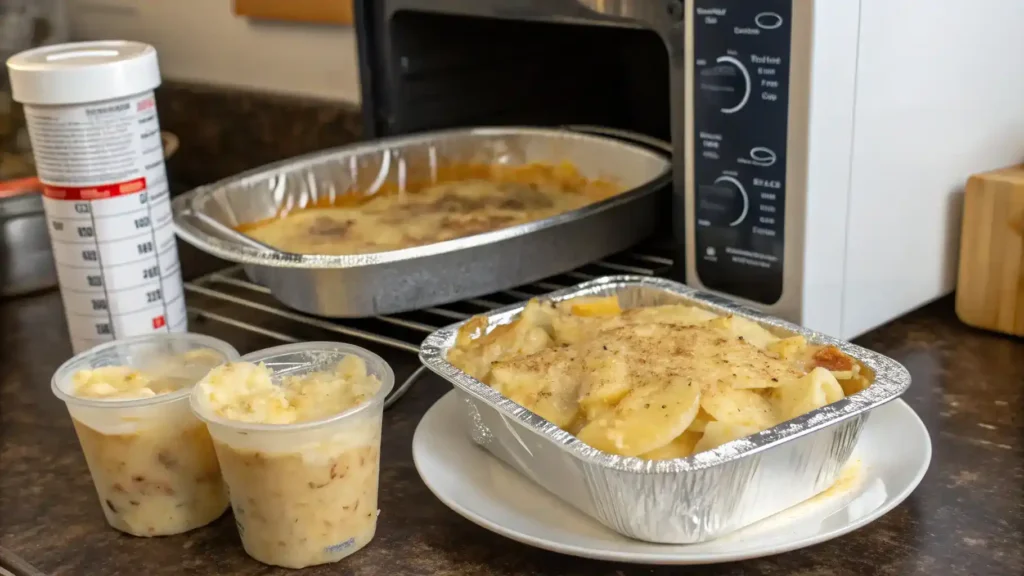
cheesy scalloped potatoes supreme
Ingredients
Equipment
Method
- Gather your ingredients: potatoes, cheese, cream, butter, and seasonings. Preheat your oven to 375°F (190°C).
- Wash and peel the potatoes. Slice them thinly, about 1/8 inch thick.
- In a saucepan, melt butter over medium heat. Stir in flour to create a roux.
- Gradually whisk in heavy cream, stirring until thickened. Season with salt, pepper, and nutmeg.
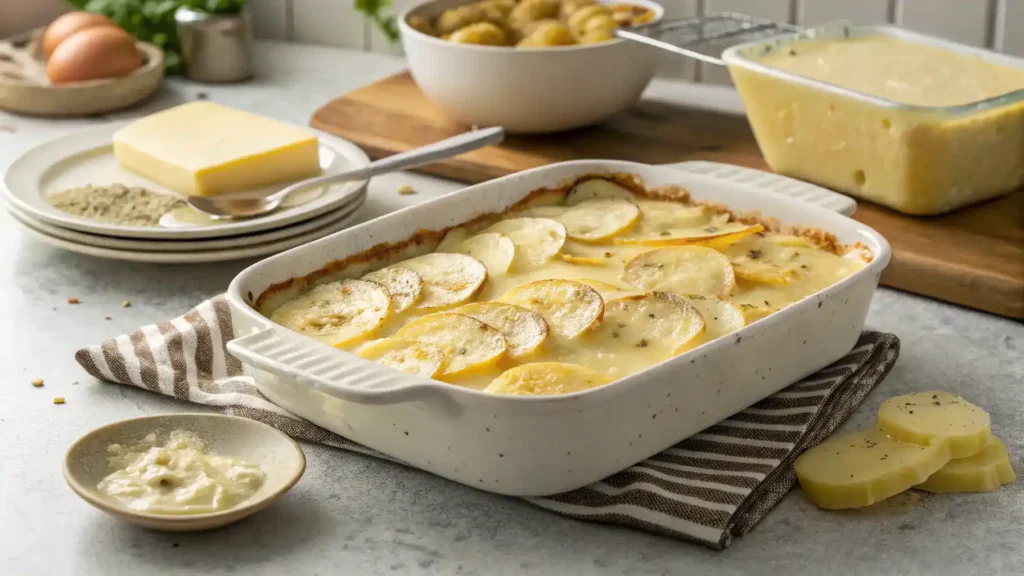
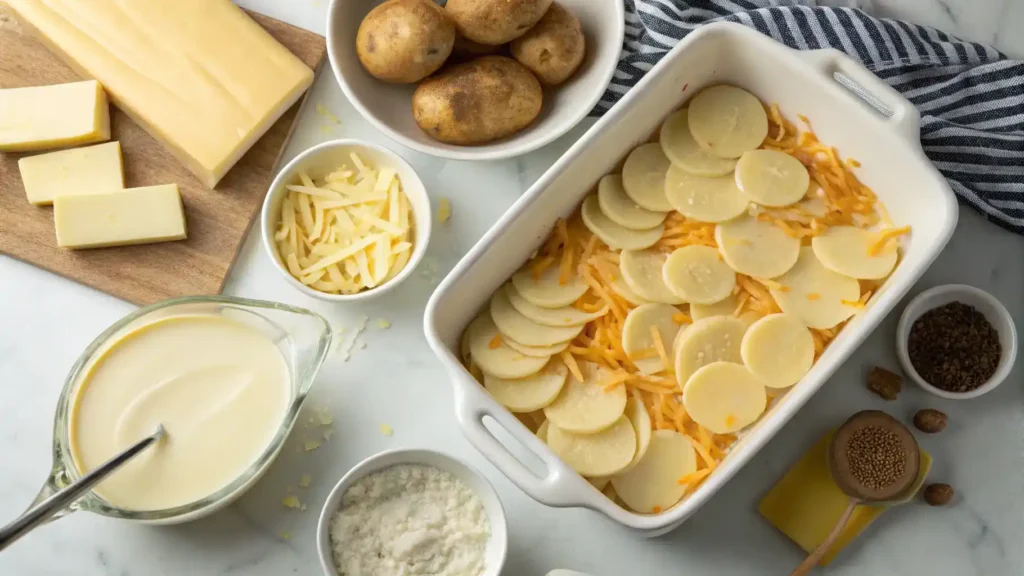
- In a greased baking dish, layer half of the sliced potatoes. Pour half of the creamy sauce over them. Sprinkle with cheese.
- Add the remaining potatoes, followed by the rest of the sauce. Top with more cheese.
- Cover with foil and bake for 45 minutes. Remove foil and bake for an additional 15-20 minutes until golden.
- Let the dish sit for about 10 minutes before serving.
- Dish out generous portions and enjoy!
Ingredients
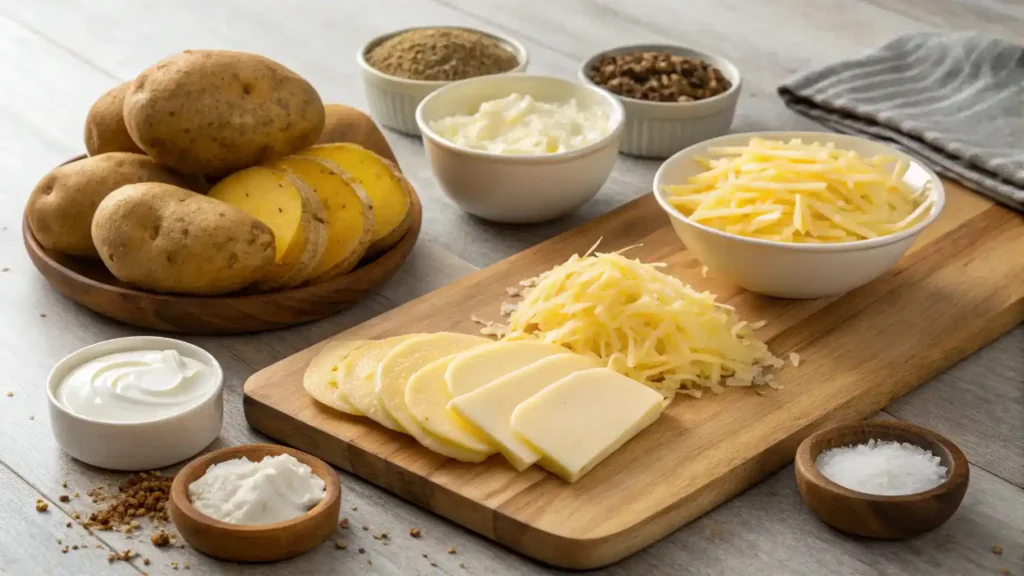
- Potatoes – A starchy base that becomes tender and creamy when baked.
- Cheddar cheese – Adds a rich, melty flavor that makes the dish irresistible.
- Heavy cream – Provides a luscious, creamy texture that binds everything together.
- Butter – Enhances flavor and helps create a golden, crispy top.
- Onion – Adds a subtle sweetness and depth of flavor.
- Garlic – Infuses the dish with aromatic goodness.
- Salt – Essential for enhancing all the flavors in the dish.
- Pepper – A dash of spice to balance the richness.
- Thyme – A fragrant herb that complements the creamy potatoes beautifully.
- Parmesan cheese – Sprinkled on top for an extra layer of flavor and a crispy finish.
Ingredients with measurements will be right under the article in the recipe card.
How to Make the Recipe
Gather your ingredients: potatoes, cheese, cream, butter, and seasonings. Preheat your oven to 375°F (190°C) for a cozy cooking environment.
Step 1: Prepare the Potatoes
Wash and peel the potatoes. Slice them thinly, about 1/8 inch thick, for even cooking.
Step 2: Make the Creamy Sauce
In a saucepan, melt 4 tablespoons of butter over medium heat. Stir in 1/4 cup of all-purpose flour to create a roux.
Step 3: Add the Cream
Gradually whisk in 2 cups of heavy cream, stirring constantly until the mixture thickens. Season with salt, pepper, and a pinch of nutmeg.
Step 4: Layer the Ingredients
In a greased baking dish, layer half of the sliced potatoes. Pour half of the creamy sauce over them. Sprinkle with 1 cup of shredded cheese.
Step 5: Repeat the Layers
Add the remaining potatoes, followed by the rest of the sauce. Top with another cup of cheese for that gooey goodness.
Step 6: Bake to Perfection
Cover the dish with foil and bake for 45 minutes. Remove the foil and bake for an additional 15-20 minutes until golden and bubbly.
Step 7: Let it Rest
Once out of the oven, let the dish sit for about 10 minutes. This helps the layers set and makes serving easier.
Step 8: Serve and Enjoy!
Dish out generous portions of your cheesy scalloped potatoes supreme. Enjoy the creamy, cheesy delight with family and friends!
Pro Tips for Making the Recipe
- Use a mix of cheeses for depth; cheddar and Gruyère work beautifully together.
- Slice potatoes evenly for consistent cooking; a mandoline can help with this.
- Layer in some sautéed onions or garlic for added flavor and aroma.
- For a creamy texture, let the dish rest for a few minutes before serving.
- Top with breadcrumbs and a sprinkle of paprika for a delightful crunch and color.
How to Serve
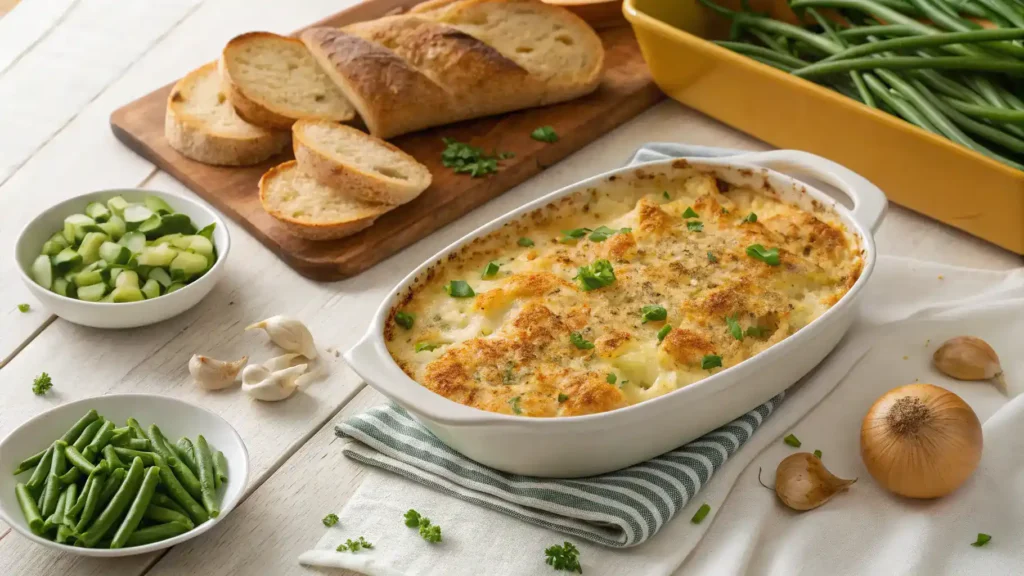
- Top with crispy fried onions for extra crunch.
- Serve alongside a fresh green salad for a balanced meal.
- Pair with grilled chicken or roasted vegetables for a hearty dinner.
- Garnish with fresh herbs like parsley or chives for a pop of color.
- Enjoy as a comforting side dish at holiday gatherings.
- Serve in individual ramekins for a fun, personal touch.
- Drizzle with a creamy garlic sauce for added flavor.
- Complement with a side of steamed broccoli or asparagus.
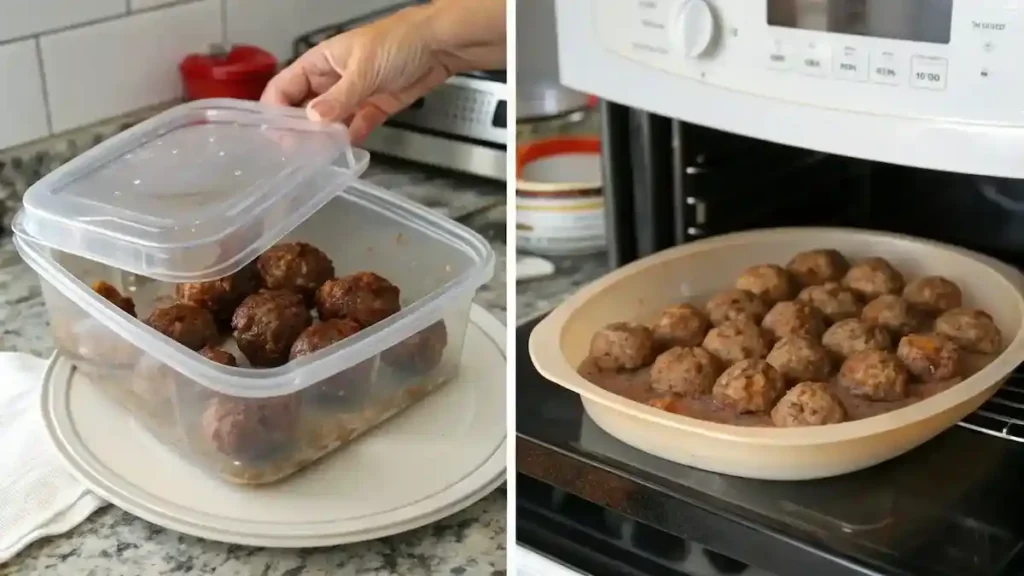
Make Ahead and Storage
Storing leftovers is easy and ensures you can enjoy your Cheesy Scalloped Potatoes Supreme later!
Storing Leftovers
• Allow the dish to cool completely before storing.
• Transfer to an airtight container.
• Store in the refrigerator for up to 3-4 days.
• Label the container with the date for easy tracking.
Freezing
• Portion the scalloped potatoes into freezer-safe containers.
• Leave some space at the top for expansion.
• Wrap tightly with plastic wrap, then foil.
• Freeze for up to 2-3 months for best quality.
Reheating
• Thaw in the refrigerator overnight before reheating.
• Preheat the oven to 350°F (175°C).
• Cover with foil to prevent drying out.
• Heat for 20-30 minutes or until warmed through.
FAQs
What type of potatoes are best for scalloped potatoes?
For the best cheesy scalloped potatoes supreme, use starchy potatoes like Russets or Yukon Golds. They create a creamy texture and hold up well during baking, ensuring each bite is deliciously tender.
Can I make this dish ahead of time?
Absolutely! You can prepare the cheesy scalloped potatoes supreme a day in advance. Just assemble the dish, cover it tightly, and refrigerate. When you’re ready to bake, allow it to come to room temperature before popping it in the oven for even cooking.
What can I substitute for heavy cream?
If you’re looking for a lighter option, you can substitute heavy cream with a mixture of milk and a bit of cornstarch or flour to thicken it. Alternatively, using half-and-half or a non-dairy milk with a thickening agent works well too!
How do I store leftovers?
To store leftovers of your cheesy scalloped potatoes supreme, let them cool completely, then transfer them to an airtight container. They can be kept in the refrigerator for up to 3-4 days. Reheat in the oven or microwave until warmed through for a comforting meal later on.
Final Thoughts
There you have it—Cheesy Scalloped Potatoes Supreme, a dish that wraps you in warmth and nostalgia with every bite! It’s simple, satisfying, and perfect for any occasion. So gather your loved ones, whip up this creamy delight, and watch as smiles light up the table. Enjoy the process, savor the flavors, and relish the joy of sharing this ultimate comfort dish. Happy cooking!