Author: Aria Belle

  • Seaweed Salad: A Superfood for Health That’s Transforming Modern Nutrition

    Seaweed Salad: A Superfood for Health That’s Transforming Modern Nutrition

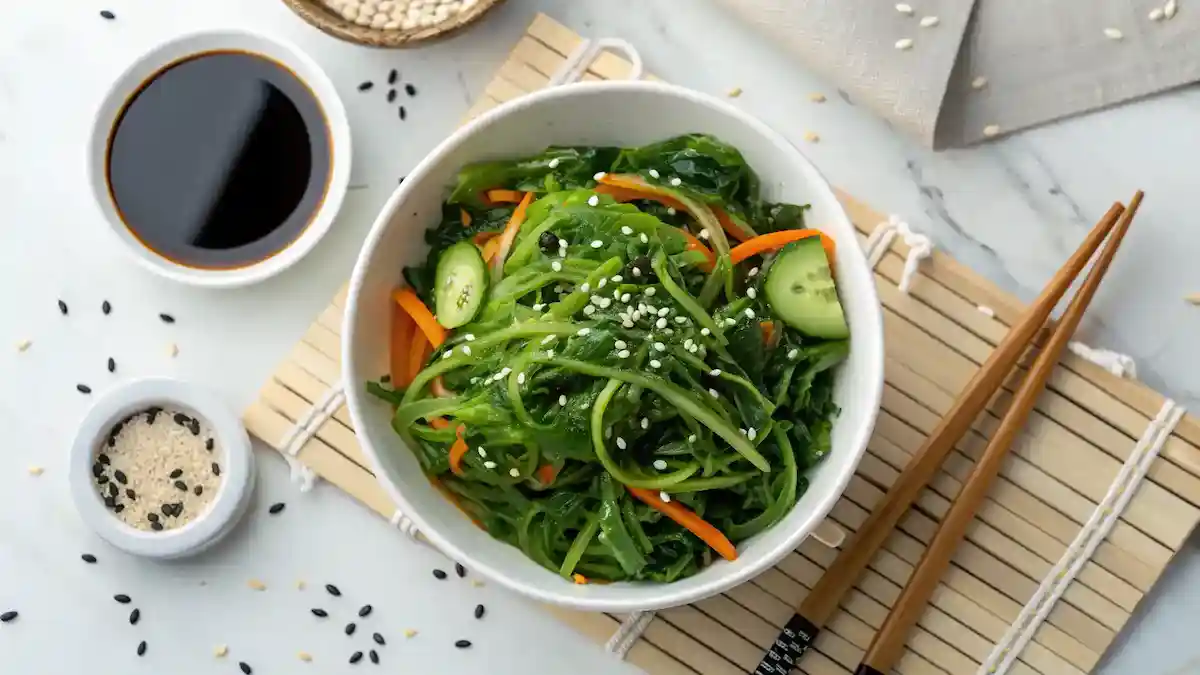
    I’ll never forget the first time I tried seaweed salad at a small Japanese restaurant in my neighborhood. What started as culinary curiosity quickly became a nutritional revelation. That glossy, emerald green dish wasn’t just delicious it was a powerhouse of nutrients I didn’t even know existed. Seaweed salad: a superfood for health that’s been quietly transforming diets around the world, and honestly? It’s about time we paid attention.

    You see, while we’ve been obsessing over kale and quinoa, seaweed has been sitting in the ocean, accumulating minerals and nutrients that make most land vegetables look like nutritional lightweights. But here’s what really caught my attention: this isn’t just another health trend. It’s a genuine superfood with centuries of proven benefits that modern science is finally starting to understand.

    Why Seaweed Salad Deserves Its Superfood Status

    The Nutritional Powerhouse Hidden in Plain Sight

    Seaweed salad nutritional comparison chart showing superior mineral content versus spinach, kale and milk
    Seaweed salad outperforms popular superfoods in key minerals: 15x more calcium than spinach, 8x more iron than kale, and naturally occurring iodine not found in land vegetables

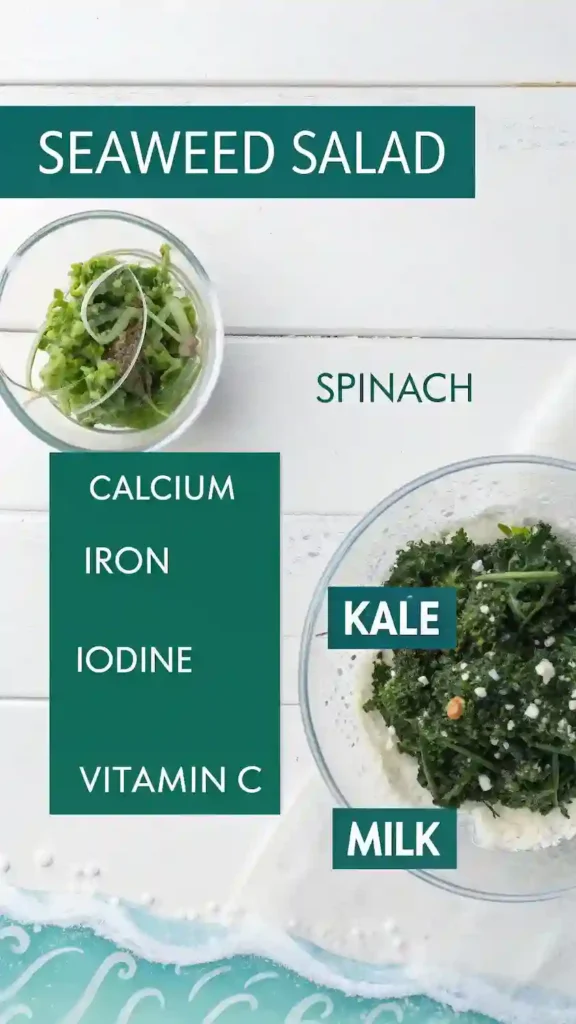
    When I first started researching seaweed salad’s nutritional profile, I was genuinely shocked. We’re talking about a food that contains more calcium than milk, more iron than spinach, and more vitamin C than oranges. That’s not hyperbole that’s documented nutritional science.

    Let me break down what makes seaweed salad such an extraordinary superfood for health:

    Mineral Content That Puts Land Vegetables to Shame:

    • Iodine: 2,000-4,000% of your daily needs in just one serving
    • Calcium: 150mg per cup (15% of daily value)
    • Iron: 2.8mg per cup (16% of daily value)
    • Magnesium: 121mg per cup (29% of daily value)
    • Potassium: 89mg per cup

    But here’s where it gets really interesting. Unlike synthetic supplements, these minerals come in their natural, bioavailable forms. Your body actually knows how to use them efficiently.

    The Unique Compounds You Won’t Find Anywhere Else

    What really sets seaweed apart from other superfoods are the unique bioactive compounds that simply don’t exist in land-based foods. I’m talking about fucoidan, alginate, and fucoxanthin—tongue-twisting names for compounds that pack serious health benefits.

    Fucoidan, for instance, has been shown in studies to support immune function and may have anti-inflammatory properties. Alginate acts as a natural detoxifier, helping your body eliminate heavy metals. And fucoxanthin? It’s been linked to metabolism support and healthy weight management.

    The Science Backed Health Benefits That Actually Matter

    Seaweed salad health benefits infographic showing thyroid support, heart health, immune system and digestive benefits
    From thyroid function to immune support, seaweed salad’s unique nutrients work synergistically to support multiple body systems for optimal health.

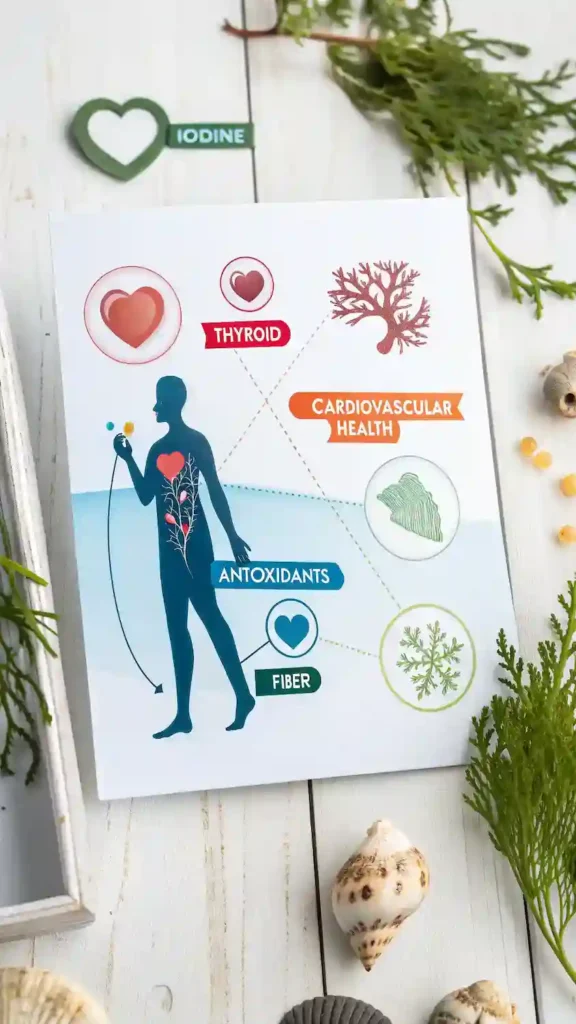
    Thyroid Support That Goes Beyond Basic Nutrition

    Here’s something most people don’t realize: your thyroid gland is basically running on seaweed. I mean that quite literally. The iodine in seaweed salad is the primary building block for thyroid hormones T3 and T4, which control everything from your metabolism to your energy levels.

    I’ve watched friends struggle with unexplained fatigue, weight gain, and brain fog classic signs of thyroid dysfunction only to see improvements when they started incorporating iodine rich foods like seaweed salad into their diets. Now, I’m not saying seaweed is a cure all, but the connection between iodine deficiency and thyroid problems is well established medical fact.

    Cardiovascular Health Benefits You Can Actually Feel

    The cardiovascular benefits of seaweed salad go way beyond the typical “heart-healthy” claims you see on cereal boxes. We’re talking about genuine, measurable improvements in heart health markers.

    The high potassium content helps regulate blood pressure naturally. The fiber content particularly the unique soluble fibers found in seaweed can help lower cholesterol levels. But what really impressed me was learning about seaweed’s ability to support healthy blood sugar levels. The alginate fiber actually slows down the absorption of sugars and fats, preventing those energy spikes and crashes that leave you reaching for more food.

    Immune System Support That’s More Than Marketing Hype

    I used to be skeptical of immune system claims, but seaweed’s immune supporting properties are backed by solid research. The beta-glucans and other polysaccharides in seaweed have been shown to enhance immune cell activity. Plus, the high vitamin C content often higher than citrus fruits provides additional immune support.

    What’s particularly interesting is how seaweed’s antioxidant compounds work synergistically. It’s not just one vitamin or mineral doing the work; it’s a complex matrix of nutrients working together in ways that isolated supplements simply can’t replicate.

    How to Choose and Prepare Seaweed Salad for Maximum Benefits

    Step-by-step guide showing how to prepare fresh seaweed salad at home for maximum health benefits
    Making fresh seaweed salad at home ensures maximum nutritional benefits while avoiding artificial additives found in commercial versions.

    Not All Seaweed Salads Are Created Equal

    Here’s where I need to share some hard won wisdom: the seaweed salad you find in most grocery stores isn’t necessarily giving you the full superfood benefits. Many commercial varieties are loaded with artificial colors, high fructose corn syrup, and preservatives that actually counteract some of the health benefits.

    What to Look For:

    • Organic certification when possible
    • Minimal ingredient lists
    • Natural seasonings (sesame oil, rice vinegar, soy sauce)
    • No artificial colors or high-fructose corn syrup
    • Fresh or properly rehydrated wakame or other sea vegetables

    The Art of Preparing Fresh Seaweed Salad

    Making your own seaweed salad isn’t just more economical it’s dramatically more nutritious. I’ve been experimenting with homemade versions for years, and the difference in taste and nutritional density is remarkable.

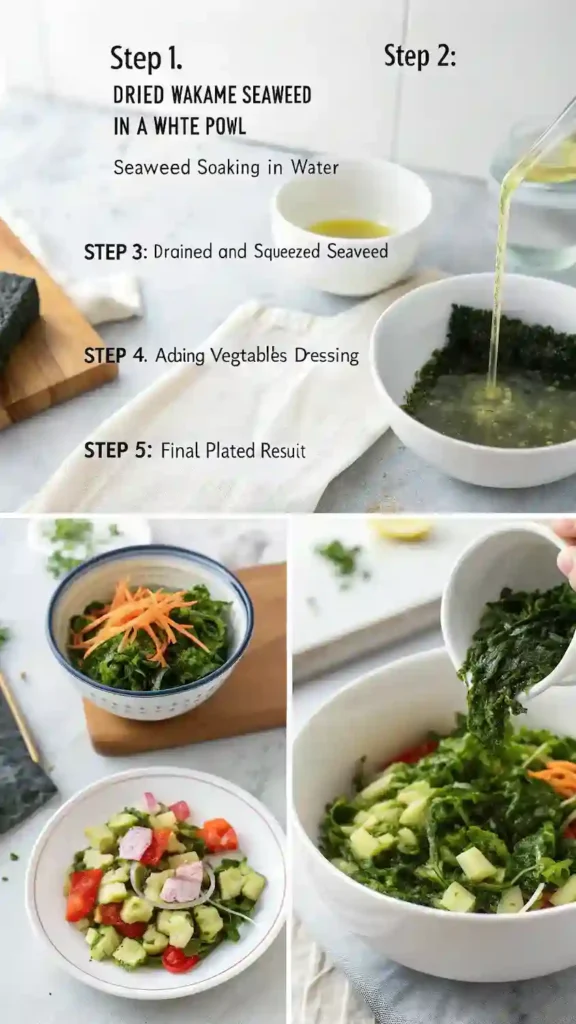
    Basic Preparation Method:

    1. Rehydrate dried wakame in cool water for 10-15 minutes
    2. Drain and gently squeeze out excess water
    3. Mix with a simple dressing of rice vinegar, sesame oil, and a touch of honey
    4. Add cucumber, carrots, or other fresh vegetables for extra nutrition and crunch

    The key is gentle handling. Over processing or using hot water can destroy some of the delicate nutrients that make seaweed salad such a nutritional powerhouse.

    Addressing Common Concerns About Seaweed Consumption

    The Iodine Question: Too Much of a Good Thing?

    I get asked about this constantly: “Can you get too much iodine from seaweed?” It’s a legitimate concern. Seaweed is incredibly rich in iodine, and excessive iodine can cause thyroid problems just as surely as too little can.

    The key is moderation and awareness. A small serving of seaweed salad (about 1/4 to 1/2 cup) a few times per week provides excellent nutritional benefits without risking iodine excess. If you’re already taking iodine supplements or have existing thyroid conditions, definitely consult with your healthcare provider before adding seaweed to your regular diet.

    Heavy Metal Concerns: Separating Facts from Fear

    Another common worry is heavy metal contamination. Seaweed does absorb minerals from seawater, including potentially harmful ones. However, studies have shown that seaweed from reputable sources typically contains heavy metals well within safe consumption limits.

    The key is sourcing. Choose seaweed from clean water sources, preferably from companies that test for contaminants. The benefits of seaweed’s mineral content far outweigh the minimal risks when you choose quality products.

    Digestive Considerations for Seaweed Newcomers

    If you’re new to eating seaweed, start slowly. The high fiber content and unique compounds can cause digestive upset if you dive in too enthusiastically. I learned this the hard way after my first enthusiasm-driven seaweed binge left me feeling less than stellar.

    Start with small portions and gradually increase as your digestive system adapts. Most people find that any initial digestive sensitivity resolves within a week or two of regular, moderate consumption.

    Incorporating Seaweed Salad Into Your Modern Diet

    Healthy Buddha bowl featuring seaweed salad with brown rice, avocado and vegetables - superfood meal inspiration
    Incorporating seaweed salad into grain bowls maximizes nutrition while creating satisfying, Instagram-worthy meals that support overall health.

    Beyond the Side Dish: Creative Integration Ideas

    While seaweed salad makes an excellent side dish, I’ve discovered dozens of ways to incorporate this superfood into everyday meals. Mixed into grain bowls, it adds both nutrition and umami flavor. Chopped fine and added to salad dressings, it provides mineral density without overwhelming flavor.

    My personal favorite? Adding rehydrated wakame to smoothies. I know it sounds weird, but the mild flavor is completely masked by fruits, and the nutritional boost is incredible.

    Pairing Strategies for Maximum Absorption

    Certain nutrients in seaweed are better absorbed when paired with specific foods. The iron in seaweed, for instance, is better absorbed when consumed with vitamin C-rich foods. The calcium is enhanced by vitamin D and magnesium both of which seaweed naturally contains.

    I’ve found that serving seaweed salad alongside foods rich in healthy fats (like avocado or nuts) helps with the absorption of fat-soluble vitamins and enhances the overall nutritional value of the meal.

    Frequently Asked Questions About Seaweed Salad

    Is seaweed salad safe for pregnant women?

    Seaweed salad can be beneficial for pregnant women due to its high folate and iron content, but the iodine levels require caution. Pregnant women should limit seaweed consumption to small, occasional servings and consult with their healthcare providers about appropriate iodine levels during pregnancy.

    How often should I eat seaweed salad for health benefits?

    For most people, enjoying seaweed salad 2-3 times per week provides excellent nutritional benefits without risking iodine excess. A typical serving size of 1/4 to 1/2 cup is ideal for regular consumption.

    Can seaweed salad help with weight loss?

    Seaweed salad can support weight management through its high fiber content, low calorie density, and compounds that may support healthy metabolism. The fiber helps you feel full while providing minimal calories, and the unique compounds may support healthy blood sugar levels.

    The Future of Seaweed as Superfood

    What excites me most about seaweed salad as a superfood for health is that we’re just scratching the surface of understanding its benefits. New research is constantly emerging about unique compounds, bioavailability factors, and therapeutic applications.

    As our understanding of nutrition evolves beyond simple vitamin and mineral counts to include factors like bioavailability, synergistic effects, and unique bioactive compounds, seaweed stands out as a truly sophisticated superfood. It’s not just nutritious—it’s nutritious in ways that work with your body’s natural systems.

    The sustainability aspect is equally compelling. While land-based agriculture strains our resources, seaweed cultivation actually improves marine ecosystems. It’s a superfood that’s good for both personal health and planetary health.

    Your Next Steps Toward Better Health

    If you’ve made it this far, you’re clearly interested in optimizing your nutrition with real, evidence based superfoods. Seaweed salad isn’t just another health trend it’s a genuinely transformative addition to a healthy diet when used thoughtfully.

    Start small, choose quality sources, and pay attention to how your body responds. In my experience, most people notice improved energy levels and better digestion within the first few weeks of regular seaweed consumption.

    The ocean has been producing this incredible superfood for millions of years. Isn’t it time you gave it a place at your table?

  • 7 Healthy Ground Beef Alternatives That Will Transform Your Favorite Recipes

    7 Healthy Ground Beef Alternatives That Will Transform Your Favorite Recipes

    Healthy eating doesn’t have to mean giving up your favorite dishes. If you’re a fan of ground beef but are looking for healthier options, you’re in the right place. Ground beef is a staple in many homes due to its versatility and ease of use. It seamlessly fits into a myriad of recipes, from classic hamburgers to comforting casseroles. However, there are plenty of alternatives that can provide similar flavors and textures while offering additional health benefits. These alternatives not only cater to those seeking to reduce their meat intake but also introduce exciting new flavors and culinary experiences. Let’s explore some healthy ground beef alternatives that you can incorporate into your meals for a nutritious twist.

    Why Consider Ground Beef Alternatives?

    Ground beef is undoubtedly delicious, but it can be high in saturated fat and calories. Consuming high levels of saturated fats can increase the risk of heart disease and contribute to unhealthy weight gain. By exploring healthier alternatives, you can enjoy your favorite recipes with less guilt and more nutritional value. Opting for leaner meats or plant-based options can help reduce cholesterol levels, support heart health, and aid in weight management. These alternatives often come with their own unique nutritional profiles, offering benefits such as increased fiber and essential vitamins. Plus, it’s always fun to try new ingredients and flavors! Experimenting with different foods can also enhance your culinary skills and provide a deeper appreciation for diverse cuisines.

    1. Lean Ground Turkey

    One of the most popular ground beef substitutes is lean ground turkey. It’s lower in fat and calories than ground beef, making it an excellent choice for those looking to eat healthier without sacrificing taste. Ground turkey is not only a great source of protein but also contains essential nutrients like selenium and zinc, which support a healthy immune system. It can be used in a variety of recipes, from burgers and tacos to casseroles and stir-fries. The mild flavor of turkey allows it to adapt well to different seasonings and cooking styles.

    Cooking with Ground Turkey

    Ground turkey cooking in skillet with onions and garlic being stirred with wooden spoon
    The secret to perfect ground turkey? Don’t forget the aromatics – they’re what transform lean meat into something absolutely delicious

    When cooking with ground turkey, it’s essential to add some moisture to prevent it from drying out. You can achieve this by incorporating ingredients like onions, garlic, or even a splash of chicken broth. These additions not only help retain moisture but also infuse the turkey with rich flavors. Ground turkey works well with various seasonings, so feel free to get creative! Consider using spices like cumin, paprika, or chili powder to give your dishes an extra kick. Additionally, adding vegetables such as bell peppers or zucchini can enhance the nutritional value and create a more balanced meal.

    2. Ground Chicken

    Ground chicken is another fantastic alternative to ground beef. It’s lean and has a mild flavor that pairs well with many dishes. Like ground turkey, ground chicken is a good source of protein and can contribute to muscle maintenance and repair. It can be used in numerous recipes, offering a healthier twist on traditional meals. Its versatility makes it an ideal choice for those who enjoy experimenting with different culinary creations.

    Ground Chicken Recipe Ideas

    Consider using ground chicken in your favorite meatball or meatloaf recipes. The light flavor of chicken allows it to absorb spices and herbs effectively, resulting in deliciously seasoned dishes. You can also try it in stir-fries or lettuce wraps for a light and flavorful meal. These options provide a refreshing alternative to heavy, carb-laden dishes. Remember to add some moisture to keep the meat tender and juicy. Ingredients like soy sauce or a hint of sesame oil can enhance the taste and keep the chicken succulent.

    3. Plant-Based Proteins

    Colorful Buddha bowl with plant-based proteins including chickpeas, quinoa, and tofu with fresh vegetables
    This is what I call a power bowl – proof that plant-based proteins can be just as satisfying as any meat-based meal.

    For those looking to reduce their meat consumption, plant-based proteins are an excellent option. Ingredients like lentils, chickpeas, and black beans can be used as ground beef alternatives in various dishes. These legumes are not only lower in fat but also high in fiber and nutrients, promoting digestive health and providing sustained energy. Plant-based proteins often come with environmental benefits as well, requiring fewer resources to produce compared to animal proteins.

    Lentils

    Close-up of cooked brown lentils in ceramic bowl showing texture and steam
    Lentils might be small, but they pack a serious protein punch – and they’re about to become your new best friend in the kitchen.

    Lentils are a versatile ingredient that can easily mimic the texture of ground beef. They are rich in protein and fiber, making them a healthy addition to your meals. Lentils are also a great source of iron and folate, essential nutrients for maintaining energy levels and supporting overall health. Use lentils in tacos, sloppy joes, or shepherd’s pie for a satisfying meatless option. Their earthy flavor complements a variety of spices, allowing for endless culinary possibilities.

    Chickpeas

    Chickpeas are another great plant-based alternative. You can mash them or pulse them in a food processor to achieve a ground meat-like texture. This method creates a hearty base that absorbs flavors well. Chickpeas work well in burgers, curries, and stews, adding both flavor and nutrition to your dishes. They are also high in antioxidants, which help protect the body from oxidative stress. Additionally, chickpeas are an excellent source of plant-based protein, making them a filling and nutritious choice for any meal.

    4. Tofu

    Tofu is a popular meat substitute for those following a vegetarian or vegan diet. It’s low in calories and contains all the essential amino acids your body needs, making it a complete protein source. Tofu’s ability to absorb the flavors of the ingredients it’s cooked with makes it a versatile option for many recipes. It can be used in both savory and sweet dishes, showcasing its adaptability in the kitchen.

    Cooking Tips for Tofu

    To achieve a ground meat texture, crumble firm tofu and sauté it with your favorite seasonings. This technique allows the tofu to develop a slight crispness, enhancing its texture. Tofu works well in stir-fries, tacos, and even pasta sauces. Its neutral flavor profile allows it to blend seamlessly into various cuisines. Experiment with different spices and marinades to find your preferred flavor profile. Consider using Asian-inspired sauces or Mediterranean herbs to create unique and delicious dishes.

    5. Mushrooms

    Before and after comparison of raw mushrooms versus finely chopped sautéed mushrooms in cast iron pan
    The mushroom transformation is real – watch how these humble fungi turn into something that’ll fool any meat lover.

    Mushrooms are a fantastic way to add umami flavor and a meaty texture to your dishes. They’re low in calories and packed with vitamins and minerals, such as vitamin D, selenium, and potassium. Mushrooms are known for their ability to enhance the savory notes in a dish, making them a favorite among chefs. You can use mushrooms as a standalone ingredient or combine them with other ground beef alternatives for a unique taste. Their earthy flavor can elevate both simple and complex recipes.

    Using Mushrooms in Recipes

    Finely chop mushrooms and use them in place of ground beef in recipes like spaghetti bolognese or stuffed peppers. This substitution not only reduces the calorie content but also adds a depth of flavor that enhances the overall dish. You can also mix them with other proteins, such as lentils or ground turkey, to boost the flavor and nutrition of your meals. This combination creates a satisfying and hearty meal that’s sure to please even the most discerning palates.

    6. Quinoa

    Quinoa is a nutrient-dense grain that can be used as a ground beef alternative in many dishes. It’s high in protein, fiber, and essential nutrients, making it a healthy choice for those looking to eat better. Quinoa’s unique texture and nutty flavor make it a versatile ingredient in both main courses and side dishes. It is also naturally gluten-free, making it an excellent option for those with dietary restrictions.

    Quinoa in Meals

    Cooked quinoa can be used as a base for stuffed peppers, mixed into soups, or combined with vegetables for a hearty salad. Its fluffy texture and mild taste complement a wide range of ingredients. It’s also an excellent addition to veggie burgers or meatless meatballs. The nutritional profile of quinoa supports heart health and provides a sustainable source of energy, making it a valuable addition to any diet.

    Conclusion

    Incorporating healthy ground beef alternatives into your meals is a great way to enjoy your favorite dishes while supporting your health goals. Whether you choose lean meats, plant-based proteins, or nutrient-rich grains, these options offer delicious and nutritious ways to diversify your diet. By integrating these alternatives, you not only improve your health but also contribute to a more sustainable food system.

    By experimenting with these alternatives, you’ll discover new flavors and textures that satisfy your taste buds and keep your meals exciting. Embracing variety in your diet ensures that you receive a broad spectrum of nutrients, promoting overall well-being. So, the next time you’re wondering what to make for dinner with hamburger meat, consider trying one of these healthy substitutes for a delicious and wholesome meal. Your journey to healthier eating can be both enjoyable and rewarding, leaving you with a sense of satisfaction and accomplishment.

  • The Ultimate Chicken Coleslaw Salad with Ginger Sesame Dressing (Ready in 20 Minutes!)

    The Ultimate Chicken Coleslaw Salad with Ginger Sesame Dressing (Ready in 20 Minutes!)

    You know those meals that somehow manage to be both incredibly satisfying and refreshingly light at the same time? This chicken coleslaw salad with ginger sesame dressing is exactly that kind of magical combination. I’ve been perfecting this recipe for the past three years, ever since I had a life-changing version at a small Vietnamese restaurant in my neighborhood.

    What started as my attempt to recreate that memorable dish has evolved into our family’s go-to weeknight dinner. My kids actually ask for salad now and honestly, I think it’s because of that irresistible ginger sesame dressing that makes everything taste like a celebration.

    Glass meal prep containers filled with chicken coleslaw salad and ginger sesame dressing for weekly lunches

    Chicken Coleslaw Salad with Ginger Sesame Dressing

    This vibrant chicken coleslaw combines crisp vegetables with tender chicken and an irresistible ginger sesame dressing that’s ready in just 20 minutes! Perfect for meal prep and packed with flavor. 🥗✨
    Prep Time 15 minutes
    Cook Time 5 minutes
    Total Time 20 minutes
    Servings: 4 servings
    Course: Main Dish, Salad
    Cuisine: “Asian-Inspired”, Healthy
    Calories: 285

    Ingredients
      

    Salad Base
    • 4 cups Green and Purple Cabbage Finely shredded for best texture.
    • 2 cups Cooked Chicken Rotisserie or leftover, shredded and cooled.
    • 1 whole Large Carrot Julienned into matchsticks.
    • 1 whole Red Bell Pepper Thinly sliced for crunch.
    • 4 stalks Green Onions Sliced on the bias.
    • 1/2 cup Snow Peas Trimmed and sliced diagonally.
    • 1/3 cup Fresh Cilantro Roughly chopped, added at the end.
    • 3 tablespoons Sesame Seeds Toasted until golden and fragrant.
    Ginger Sesame Dressing
    • 2 tablespoons Fresh Ginger Grated using microplane for finest texture.
    • 2 whole Garlic Cloves Minced finely for even distribution.
    • 3 tablespoons Rice Vinegar Milder than white vinegar, perfect balance.
    • 1 tablespoon Fresh Lime Juice Freshly squeezed for best flavor.
    • 2 tablespoons Low-Sodium Soy Sauce Or tamari for gluten-free option.
    • 2 tablespoons Toasted Sesame Oil Key flavor component – don’t skip!
    • 1 tablespoon Honey Balances acidity, use maple syrup for vegan.
    • 3 tablespoons Neutral Oil Avocado or vegetable oil for smooth consistency.
    • 1 teaspoon Dijon Mustard Helps emulsify the dressing.
    • pinch Red Pepper Flakes Optional, add heat to taste.

    Equipment

    • 1 Large mixing bowl For combining all salad ingredients.
    • 1 Mason Jar or Small Bowl For making and emulsifying the dressing.
    • 1 Sharp Chef’s Knife Essential for fine vegetable prep.
    • 1 Cutting Board For safe vegetable preparation.
    • 1 Microplane Grater For grating fresh ginger.
    • 1 Small Skillet For toasting sesame seeds.

    Method
     

    Step 1: Toast the Sesame Seeds
    1. Heat a dry skillet over medium heat. Add sesame seeds and toast for 2-3 minutes, shaking the pan frequently, until golden brown and fragrant. Remove from heat and set aside to cool.
    Step 2: Prepare All Vegetables
    1. Using a sharp knife, finely shred the cabbage into thin ribbons. Julienne the carrot into matchstick pieces. Thinly slice the red bell pepper and snow peas. Slice green onions on the bias. Pat the shredded chicken dry with paper towels.
    Step 3: Make the Ginger Sesame Dressing
    1. In a mason jar, combine grated ginger, minced garlic, rice vinegar, lime juice, soy sauce, sesame oil, honey, neutral oil, Dijon mustard, and red pepper flakes. Seal tightly and shake vigorously for 30 seconds until completely emulsified and smooth.
    Step 4: Combine the Salad
    1. In a large mixing bowl, combine the shredded cabbage, chicken, carrots, bell pepper, snow peas, and green onions. Pour about three-quarters of the dressing over the mixture and toss gently but thoroughly to coat everything evenly.
    Step 5: Rest and Season
    1. Let the salad sit for 5-10 minutes to allow the flavors to meld and the vegetables to soften slightly. Taste and adjust seasoning – add remaining dressing if needed, or more soy sauce, lime juice, or red pepper flakes to your preference.
    Step 6: Final Touches and Serve
    1. Just before serving, gently fold in the chopped cilantro and sprinkle with toasted sesame seeds. Serve immediately chilled or at room temperature. Store leftovers covered in the refrigerator for up to 3 days.

    Notes

    Essential nutrition facts per serving:
    Nutrient Amount
    Calories 285
    Fat 16g
    Protein 24g
    Carbs 12g
    Fiber 4g
    Sugar 8g
    Sodium 380mg
    Health Benefits: Rich in vitamin C from cabbage and bell peppers, anti-inflammatory ginger, heart-healthy sesame oil, and complete protein from chicken.

    Why You’ll Fall in Love With This Chicken Coleslaw Salad

    Let me be honest I’m usually skeptical of recipes that promise to be “life-changing.” But this chicken coleslaw genuinely transformed how I think about weeknight dinners. Here’s why it works so beautifully:

    It’s ridiculously versatile. Some nights I serve it as-is with chopsticks and call it dinner. Other times, I stuff it into whole wheat tortillas for the most satisfying wraps you’ve ever had. My teenager loves it over rice bowls, and my husband has been known to eat it straight from the container at midnight (don’t tell him I know).

    The texture is absolutely perfect. There’s something deeply satisfying about the interplay between crisp vegetables and tender chicken, all brought together by that silky ginger sesame dressing. Every bite gives you a little crunch, a little chew, and a burst of flavor that keeps you coming back for more.

    It actually gets better with time. Unlike most salads that wilt and lose their appeal, this one develops more complex flavors as it sits. The cabbage softens just slightly while maintaining its crunch, and the dressing penetrates all those lovely vegetables.

    The Science Behind Perfect Coleslaw

    Before we dive into the recipe, let’s talk about what makes coleslaw actually good because we’ve all had those watery, flavorless versions that barely qualify as food.

    The secret lies in understanding how cruciferous vegetables like cabbage behave. Cabbage contains natural enzymes that break down cell walls over time, which is why store bought coleslaw often turns soggy. But when you control this process by cutting your vegetables properly and timing your dressing application just right you get that perfect tender crisp texture.

    I learned this the hard way after making countless watery coleslaws in my early cooking days. Now I know that the key is in the knife work (thin, uniform cuts) and the resting time (just 5-10 minutes after dressing).

    Ingredients & Why Each One Matters

    For the Salad:

    Organized ingredient bowls for chicken coleslaw with ginger sesame dressing recipe preparation
    Quality ingredients make all the difference – here’s everything you need to create this restaurant-worthy chicken coleslaw at home.
    • 4 cups mixed green and purple cabbage, finely shredded The star of the show. I always use a mix because the purple adds gorgeous color and slightly different texture. Pro tip: Save time by buying pre-shredded, but rinse it first to remove excess moisture.
    • 2 cups cooked chicken, shredded I usually grab a rotisserie chicken for convenience, but leftover grilled chicken works beautifully too. The key is making sure it’s completely cooled and patted dry before adding it to the salad.
    • 1 large carrot, julienned Adds natural sweetness and that satisfying crunch. I prefer julienning over grating because it maintains better texture.
    • 1 red bell pepper, thinly sliced Beyond the gorgeous color, red peppers provide vitamin C and antioxidants. Plus, they add a subtle sweetness that balances the ginger’s heat.
    • 4 green onions, sliced on the bias This gives you that gentle onion flavor without the bite of regular onions. Slicing on the bias isn’t just for looks it actually creates more surface area for better flavor distribution.
    • 1/2 cup snow peas, trimmed and sliced These add a pop of green and a different type of crunch. If you can’t find snow peas, sugar snap peas work just as well.
    • 1/3 cup fresh cilantro, roughly chopped I know cilantro is divisive, but trust me on this one. It adds brightness that really makes the Asian flavors sing. If you’re in the cilantro-tastes-like-soap camp, try fresh mint instead.
    • 3 tablespoons toasted sesame seeds Don’t skip the toasting step! It takes 2 minutes and transforms these from bland to nutty and aromatic.

    For the Ginger Sesame Dressing:

    Hands shaking mason jar with homemade ginger sesame salad dressing
    The secret to this salad’s incredible flavor is this homemade ginger sesame dressing – just shake and serve!
    • 2 tablespoons fresh ginger, grated This is where the magic happens. Fresh ginger has a bright, almost floral quality that dried ginger just can’t match. I use a microplane grater for the finest texture.
    • 2 cloves garlic, minced Provides the savory backbone that balances the ginger’s heat.
    • 3 tablespoons rice vinegar The acidity brightens everything and helps emulsify the dressing. Rice vinegar is milder than white vinegar, which works perfectly here.
    • 1 tablespoon fresh lime juice Adds that bright, citrusy note that makes everything pop.
    • 2 tablespoons low-sodium soy sauce For that umami depth. I prefer low-sodium so I can control the salt level.
    • 2 tablespoons toasted sesame oil This is your flavor powerhouse. Sesame oil has an incredibly rich, nutty flavor that a little goes a long way.
    • 1 tablespoon honey Balances the acidity and adds just enough sweetness without making it dessert-like.
    • 3 tablespoons neutral oil I use avocado oil, but any neutral oil works. This helps the dressing coat everything evenly.
    • 1 teaspoon Dijon mustard The secret emulsifier that keeps your dressing from separating.
    • Pinch of red pepper flakes Just enough heat to make things interesting.

    Step by Step Recipe Instructions

    Hands using chef's knife to finely shred purple cabbage for coleslaw on cutting board
    The key to perfect coleslaw texture is in the knife work – thin, uniform ribbons make all the difference.

    Prep Time: 15 minutes | Serves: 4-6

    Step 1: Toast Your Sesame Seeds Heat a dry skillet over medium heat and add the sesame seeds. Toast them for 2-3 minutes, shaking the pan frequently, until they’re golden and fragrant. This step is crucial it unlocks so much more flavor than using them raw. Set aside to cool.

    Step 2: Prepare Your Vegetables Here’s where good knife skills really pay off. Shred your cabbage as finely as you can I’m talking thin ribbons, not chunks. Julienne the carrot into matchstick-thin pieces. Slice the bell pepper and snow peas thinly. The goal is uniform pieces that will hold the dressing well.

    Step 3: Make the Magic Dressing In a mason jar (my preferred method) or a bowl, combine the grated ginger, minced garlic, rice vinegar, lime juice, soy sauce, sesame oil, honey, neutral oil, and Dijon mustard. If using a jar, seal it tight and shake vigorously for about 30 seconds until it’s completely emulsified. If using a bowl, whisk energetically until smooth.

    Step 4: Combine and Rest In a large bowl, combine the shredded cabbage, chicken, carrots, bell pepper, snow peas, and green onions. Pour about three-quarters of the dressing over the mixture and toss gently but thoroughly. Let it sit for 5-10 minutes this is when the magic happens. The vegetables will soften just slightly while absorbing all those incredible flavors.

    Step 5: Final Touches Taste and adjust. Need more tang? Add the remaining dressing. Want more heat? Sprinkle in some red pepper flakes. Just before serving, fold in the cilantro and toasted sesame seeds.

    Pro Tips for Restaurant-Quality Results

    Master the knife work. I can’t stress this enough the difference between good coleslaw and great coleslaw often comes down to how you cut your vegetables. Invest in a sharp knife and take your time. Uniform, thin cuts mean better texture and more surface area for the dressing to cling to.

    Don’t overdress. It’s tempting to dump all the dressing in at once, but restraint is key. Start with less than you think you need you can always add more, but you can’t take it away.

    Temperature matters. Serve this chilled or at room temperature. The flavors are most vibrant when the salad isn’t ice-cold, but it shouldn’t be warm either.

    Make it your own. This recipe is incredibly forgiving. No snow peas? Use sugar snap peas or even thinly sliced cucumber. Out of cilantro? Try fresh basil or mint. The base combination of cabbage, chicken, and ginger sesame dressing is your foundation everything else can be adjusted to your taste or what’s in your fridge.

    Nutritional Benefits

    Let’s talk about why this salad is as good for your body as it is for your taste buds. One serving (about 1.5 cups) contains approximately:

    • Calories: 285
    • Protein: 24g
    • Carbohydrates: 12g
    • Fiber: 4g
    • Healthy fats: 16g

    The nutritional powerhouses:

    Cabbage is loaded with vitamin K, vitamin C, and fiber while being incredibly low in calories. It’s also rich in antioxidants that may help reduce inflammation.

    The ginger in our dressing isn’t just for flavor it’s been studied for its potential anti-inflammatory and digestive benefits. I’ve definitely noticed that I feel more satisfied and less bloated after eating this salad compared to heavier meals.

    Lean chicken provides complete protein, which means it contains all nine essential amino acids your body needs. This makes the salad genuinely filling and satisfying, not just a bunch of rabbit food.

    Serving Suggestions & Variations

    Three different ways to serve chicken coleslaw salad - in bowl, wrap, and over rice
    From wraps to Buddha bowls, this versatile chicken coleslaw adapts to any meal style you’re craving.

    As a Main Dish: Serve it in chilled bowls with chopsticks or forks. I like to add some steamed edamame on the side and maybe some rice crackers for extra crunch.

    In Wraps: This might be my favorite way to eat it. Warm up some whole wheat tortillas, add a generous scoop of the salad, and roll them up. The combination of warm tortilla and cool, crispy filling is absolutely divine.

    Over Rice: Turn it into a Buddha bowl by serving over brown rice with some sliced avocado and a sprinkle of nori sheets.

    Sandwich Style: Pile it high on toasted whole grain bread for an incredibly satisfying lunch.

    Variations I love:

    Protein swaps: Try shrimp, tofu, or even leftover salmon instead of chicken.

    Vegetable additions: Thinly sliced radishes add peppery crunch, while shredded Brussels sprouts give you a different cruciferous vegetable experience.

    Nut additions: Toasted peanuts or sliced almonds add richness and crunch.

    Spice it up: Add some thinly sliced jalapeño or a dash of sriracha to the dressing for more heat.

    Storage & Make Ahead Tips

    For best results: Store the dressed salad in the refrigerator for up to 3 days. The flavors actually develop and improve over time, though the vegetables will soften slightly.

    For maximum crunch: Store the components separately. Keep the dressing in a jar, the prepared vegetables in one container, and the chicken in another. Combine them just before serving.

    Meal prep friendly: This salad is perfect for weekly meal prep. I often make a big batch on Sunday and portion it out for lunches throughout the week.

    The dressing keeps: Make a double batch of the ginger sesame dressing it’ll keep in the refrigerator for up to two weeks and is fantastic on green salads, grain bowls, or as a marinade for proteins.

    Frequently Asked Questions

    Can I make this ahead of time?

    Absolutely! In fact, it’s better after it’s had some time to meld. Just add the cilantro and sesame seeds right before serving to maintain their texture and bright flavor.

    What if I can’t find certain ingredients?

    This recipe is very forgiving. Napa cabbage works beautifully instead of regular cabbage, apple cider vinegar can substitute for rice vinegar in a pinch, and maple syrup works in place of honey for a vegan version.

    Is this gluten-free?

    Almost! Just swap the soy sauce for tamari or coconut aminos to make it completely gluten-free.

    Can I use store-bought coleslaw mix?

    You can, but I’d recommend rinsing and drying it thoroughly first. Pre cut vegetables often have excess moisture that can make your salad watery.

    How do I prevent the salad from getting soggy?

    The key is not over-dressing it and making sure your vegetables are completely dry before mixing. Also, add delicate herbs like cilantro just before serving.

    Final Thoughts

    There’s something deeply satisfying about mastering a recipe that looks complicated but is actually quite simple. This chicken coleslaw salad has become one of those reliable friends in my recipe collection the kind of dish I can make without thinking, but that never fails to impress.

    Whether you’re meal prepping for the week, trying to get more vegetables into your family’s diet, or just looking for something fresh and satisfying for dinner tonight, this salad delivers. The combination of textures, the bright and complex flavors, and the fact that it actually improves with time makes it a winner in my book.

    Give it a try, make it your own, and let me know how it turns out! I’d love to hear about any variations you discover along the way.

  • 5 Dairy Free Weeknight Dinners That Actually Taste Amazing

    5 Dairy Free Weeknight Dinners That Actually Taste Amazing

    Let’s be honest going dairy free doesn’t have to mean sacrificing flavor or satisfaction

    You know that moment when you’re staring into your fridge at 6 PM, wondering how on earth you’re going to pull together dairy free weeknight dinners that don’t rely on your usual cheese heavy comfort foods? I’ve been there more times than I care to admit.

    Whether you’re dealing with lactose intolerance, trying to reduce inflammation, or simply wanting to diversify your weekly meal rotation, finding dairy free weeknight dinners that actually excite you can feel like searching for a needle in a haystack. But here’s what I’ve learned after years of experimenting in the kitchen: the best dairy free weeknight dinners aren’t trying to replace dairy they’re celebrating ingredients that never needed it in the first place.

    Why Your Weeknight Dinners Need This Dairy Free Revolution

    Before we dive into these game changing recipes, let’s talk about why this matters. I used to think dairy free meant bland, boring, or requiring specialty ingredients that cost a fortune. But here’s the truth that completely shifted my perspective: many dishes rely on butter, milk, cheese, or heavy cream not because they need to, but because that’s what we’ve always done.

    Setting aside a few nights each week for dairy free meals can be beneficial, especially if you have difficulty digesting dairy or eat it in large quantities regularly. And honestly? Your digestive system will thank you for the break, even if you don’t have any specific dairy issues.

    What really sold me on this approach was discovering that all 5 of these dairy free recipes are ready in 40 minutes or less, making them a great option for a dairy free weeknight dinners. Because let’s face it if it takes longer than that on a Tuesday night, it’s probably not happening in my kitchen.

    Recipe #1 : The 10 Minute Miracle Rotisserie Chicken Power Bowl

    Dairy Free Weeknight Dinners
    This protein-packed power bowl comes together in just 10 minutes using convenient rotisserie chicken and fresh vegetables.

    Can we talk about those nights when you walk through the door and the thought of actually cooking feels impossible? This recipe saved my sanity during one particularly crazy week, and I’ve been obsessed ever since.

    The genius here lies in using rotisserie chicken something I used to feel slightly guilty about until I realized it’s actually a nutritional powerhouse. This recipe transforms that convenient protein into something that feels completely intentional and fresh.

    What makes this work so beautifully is the combination of broccoli and carrots that add both crunch and color, while the 10 minute prep time means you’re literally eating a nutritious, satisfying meal before your takeout app would even finish loading.

    Pro tip from my own kitchen experiments: if you want to keep things lower in sugar, simply skip the honey and dried cranberries. The natural sweetness from the carrots is often enough to satisfy that end of day craving for something a little sweet.

    Recipe #2 : Creamy Pumpkin Soup That Doesn’t Miss Heavy Cream

    Bowl of creamy orange pumpkin soup topped with crispy tofu cubes and coconut milk swirl with steam rising
    Rich and creamy without any dairy, this pumpkin soup gets its luxurious texture from coconut milk and packs 26 grams of protein per serving.

    I’ll admit it I was skeptical about pumpkin soup without dairy. How could it possibly be as rich and satisfying as the versions loaded with heavy cream? But this recipe completely changed my mind about what “creamy” can mean.

    The secret weapon here is coconut milk, which creates that luxurious texture we all crave in a good soup. Instead of dairy, this recipe uses coconut milk and vegetable broth, which makes the recipe creamy and flavorful. The result? A soup that’s actually more complex and interesting than its dairy-heavy counterparts.

    What really elevates this dish is the spice blend red pepper flakes, coriander, curry powder, and minced garlic create layers of flavor that make each spoonful feel like a warm hug. And here’s something that might surprise you: this recipe also contains 26 grams (g) of protein per serving, which is largely from the crispy tofu added on top of the soup.

    When you’re shopping for ingredients, here’s a tip I learned the hard way: make sure to choose sugar free coconut milk and low sodium vegetable broth. Your taste buds (and your sodium intake) will thank you.

    Recipe #3 : The Fiber Packed Pasta That Feels Like Comfort Food

    Plate of creamy pasta with cashew lentil sauce garnished with fresh basil and black pepper, fork twirling pasta
    This fiber-rich pasta gets its creamy texture from blended cashews and lentils, creating a satisfying sauce without any dairy.

    Let me tell you about the day I discovered that creamy pasta sauce doesn’t actually need cream. This revelation was right up there with finding out you can make amazing chocolate chip cookies without butter it just changes everything.

    This pasta dish proves that plant based doesn’t mean compromising on richness or satisfaction. The sauce consists of vegetables, cashews, and lentils, making it a filling and flavorful meal. What I love most about this combination is how the cashews create that velvety texture while the lentils add both protein and fiber, making this genuinely satisfying in a way that leaves you energized rather than sluggish.

    The fact that this well rounded meal is ready in just 35 minutes makes it perfect for those nights when you want something that feels special but don’t have hours to spend in the kitchen.

    Here’s a upgrade I’ve tried that’s absolutely worth it: consider swapping out the regular pasta for brown rice pasta if you want an extra nutritional boost. The nutty flavor actually complements the cashew lentil sauce beautifully.

    Recipe #4 : Sweet Potato Chickpea Curry That’s Pure Comfort

    Colorful curry bowl with roasted sweet potato cubes, chickpeas, and vegetables over brown rice topped with dairy-free yogurt
    This warming curry combines sweet potatoes and chickpeas for a filling meal that delivers 16 grams of protein and plenty of fiber.

    Sometimes you need a meal that feels like a warm blanket and tastes like a flavor explosion. This curry delivers on both fronts, and it’s become my go to when I need something that feels both nourishing and indulgent.

    What makes this recipe so satisfying is the combination of sweet potatoes and chickpeas two ingredients that complement each other perfectly in terms of both texture and nutrition. This dish is tasty and filling, thanks to sweet potatoes, chickpeas, dairy free yogurt, and brown rice.

    The protein content might surprise you this recipe gets its protein from the chickpeas and delivers a solid 16 grams per serving. But if you’re looking to bump that up, here’s a trick I’ve used: you can always add tofu to the recipe. Simply press the tofu with a paper towel for 15 minutes and then bake it for 20 minutes at 400° F (200° C).

    The beauty of this dish is in its adaptability. You can make it as mild or as spicy as you like, and it tastes even better the next day perfect for meal prep or those weeks when you want to cook once and eat twice.

    Recipe #5 : Jambalaya That Brings the Heat (Without the Dairy)

    Cast iron skillet filled with colorful jambalaya featuring cauliflower rice, shrimp, bell peppers, and tomatoes garnished with green onions
    This healthier take on jambalaya swaps white rice for cauliflower and delivers 34 grams of protein with only 369 calories per serving.

    Let’s end with something that proves dairy free doesn’t mean flavor free. This jambalaya is what happens when comfort food meets healthy eating goals, and honestly? I think it might be better than the traditional version.

    With 34 g of protein and only 369 calories, this recipe is a great option for nearly anyone’s diet, including the keto diet. But what really makes this special is the incredible flavor profile created by cayenne, cumin, dried thyme, smoked paprika, and minced garlic.

    Here’s where this recipe gets really clever: if you’re looking to make this recipe a little healthier, you can substitute the white rice for cauliflower rice and the chorizo for vegetable chorizo. I’ve tried both versions, and while the traditional approach is delicious, the cauliflower rice version actually lets the spices shine even brighter.

    And for my vegetarian friends, simply remove the shrimp from the dish! The combination of vegetables and spices is robust enough to carry the meal beautifully on its own.

    The Real Game Changer : Mindset Over Ingredients

    Here’s what I’ve learned from making these recipes part of my regular rotation: the magic isn’t in finding perfect dairy substitutes it’s in embracing ingredients that were always meant to be the stars of the show.

    All five of these recipes are dairy free options that are a great source of protein, fiber, and vitamins. More importantly, they’re proof that eating well doesn’t require complicated substitutions or expensive specialty products.

    The best part? You can make food swaps to any of these recipes to satisfy your personal preferences and dietary needs. This isn’t about following rules it’s about discovering what works for your taste buds, your schedule, and your life.

    Your Dairy Free Journey Starts Tonight

    Coming up with what to cook each night can feel incredibly difficult, especially if you’re looking to cook something healthy yet filling. But with these five recipes in your back pocket, you’re never more than 40 minutes away from a meal that satisfies on every level.

    Start with whichever recipe speaks to you most maybe it’s the 10 minute chicken bowl for tonight’s dinner, or perhaps the pumpkin soup for this weekend’s meal prep session. The point isn’t to overhaul your entire diet overnight; it’s to add some delicious new options to your weeknight repertoire.

    Trust me on this: once you taste how incredible these dairy free meals can be, you’ll wonder why you didn’t start making them sooner. Your taste buds, your energy levels, and your weeknight stress levels will all thank you.

    Ready to give your weeknight dinners a dairy free makeover? Choose one recipe to try this week I promise it’ll be the beginning of something delicious.

  • The Mediterranean Quinoa Power Bowl That Changed My Weeknight Dinners Forever

    The Mediterranean Quinoa Power Bowl That Changed My Weeknight Dinners Forever

    You know that moment when you discover a recipe that’s so perfectly balanced between healthy and delicious that it literally transforms your entire meal routine? That’s exactly what happened to me with this Mediterranean Quinoa Power Bowl. I’m not exaggerating when I say it’s become my weekly salvation for those crazy weeknights when I need something nutritious, satisfying, and incredibly flavorful all without spending hours in the kitchen.

    I’ll be honest with you: I used to be intimidated by quinoa. There, I said it! For the longest time, I thought it was just another trendy superfood that would taste like cardboard. But once I learned the secret to cooking it perfectly (which I’m definitely sharing with you today), everything changed. This bowl has become my answer to the eternal question: “What’s for dinner that’s actually good for me?”

    The Science Behind Why This Bowl Works So Well

    Here’s what I love about this recipe from a nutritional standpoint and trust me, I’ve done my research on this one. Quinoa is what we call a “complete protein,” meaning it contains all nine essential amino acids your body needs. That’s pretty incredible for a grain like seed, right? Combined with the healthy fats from olive oil and tahini, plus the fiber-rich vegetables, you’re getting a meal that will keep you satisfied for hours.

    But here’s the real kicker: the Mediterranean diet components in this bowl have been linked to improved heart health, better brain function, and even longevity. I’m talking about ingredients like olive oil, fresh herbs, tomatoes, and cucumber foods that people in Mediterranean regions have been thriving on for centuries.

    My Personal Journey with This Recipe

    I actually discovered this combination during a particularly stressful period when I was working late nights and struggling to eat well. My energy was crashing every afternoon, and I knew I needed to change something fundamental about my eating habits. This bowl became my reset button it gives me sustained energy without that heavy, sluggish feeling I used to get from less nutritious meals.

    The best part? My kids actually love it too, which, let’s be real, is basically a miracle in my household. They call it “the colorful bowl,” and honestly, that’s not a bad description!

    Ingredients You’ll Need (And Why I Choose Each One)

    Flat lay of quinoa bowl ingredients including tri-color quinoa, cherry tomatoes, cucumber, feta cheese, olives, fresh herbs, lemon, and tahini on marble surface
    Fresh, wholesome ingredients are the secret to this amazing Mediterranean Quinoa Power Bowl. Everything you need for a nutritious, satisfying meal!

    For the Quinoa Base:

    • 1 cup quinoa (I prefer tri-color for visual appeal)
    • 2 cups vegetable broth (adds so much more flavor than water)
    • 1 tablespoon olive oil
    • 1/2 teaspoon salt

    For the Fresh Components:

    • 1 large cucumber, diced (adds incredible crunch)
    • 2 cups cherry tomatoes, halved (I use a mix of colors when possible)
    • 1/2 red onion, thinly sliced (don’t skip this it adds the perfect bite)
    • 1/2 cup kalamata olives, pitted (the briny flavor is essential)
    • 1/2 cup crumbled feta cheese (go for the good stuff if you can)
    • 1/4 cup fresh parsley, chopped
    • 2 tablespoons fresh mint, chopped (this is what makes it sing)

    For the Tahini Dressing:

    • 3 tablespoons tahini
    • 2 tablespoons lemon juice (fresh is non-negotiable)
    • 1 clove garlic, minced
    • 2 tablespoons warm water (to thin it out)
    • 1 tablespoon olive oil
    • 1/2 teaspoon ground cumin
    • Salt and pepper to taste

    Optional Protein Boost:

    • 1 cup cooked chickpeas (canned works perfectly)
    • OR grilled chicken, sliced
    • OR hard-boiled eggs, halved

    Step-by-Step Instructions (The Way I Actually Make It)

    Close-up of perfectly cooked fluffy quinoa in saucepan with wooden spoon and steam rising, showing proper quinoa texture and cooking technique
    The secret to perfect quinoa every time! Notice how each grain is fluffy and separate – never mushy. This foolproof cooking method will change your quinoa game forever.

    Step 1: Perfect the Quinoa (This Is Crucial!)

    Here’s my foolproof method for quinoa that’s never mushy or bitter: First, rinse your quinoa in a fine-mesh strainer until the water runs clear. This removes the natural coating that can taste bitter—seriously, don’t skip this step!

    In a medium saucepan, heat the olive oil over medium heat. Add the rinsed quinoa and toast it for about 2 minutes, stirring constantly. You’ll hear it start to pop slightly that’s exactly what you want. This toasting step adds incredible nutty flavor.

    Add the vegetable broth and salt, bring to a boil, then reduce to low heat and cover. Cook for 15 minutes, then remove from heat and let it sit (still covered) for 5 minutes. Finally, fluff with a fork. This method gives you quinoa with perfect texture every single time.

    Step 2: Prepare Your Fresh Components

    While the quinoa is cooking, I like to prep all my vegetables. There’s something meditative about chopping fresh ingredients, and the colors are just so vibrant and inviting. I dice the cucumber into bite-sized pieces, halve the cherry tomatoes, and slice the red onion as thinly as possible (a mandoline works great for this if you have one).

    Step 3: Make the Magic Tahini Dressing

    This dressing is what ties everything together, and I promise it’s easier than you think. In a small bowl, whisk together the tahini, lemon juice, and minced garlic. It’ll look a bit thick and possibly separated at first that’s totally normal! Gradually whisk in the warm water until you get a smooth, creamy consistency. Add the olive oil, cumin, salt, and pepper. Taste and adjust I usually add a pinch more salt and sometimes an extra squeeze of lemon.

    Step 4: Assemble Your Masterpiece

    I love serving this family style in a large bowl, but individual portions work beautifully too. Start with the cooled quinoa as your base, then arrange all your fresh components on top. I like to create little sections of each ingredient so everyone can customize their bowl. Drizzle the tahini dressing over everything, and finish with a sprinkle of fresh herbs.

    Pro Tips I’ve Learned Along the Way

    Make It Ahead: This bowl actually gets better as it sits (except for the dressing add that right before serving). I often make a big batch on Sunday and eat it throughout the week.

    Storage Secrets: Store all components separately in the refrigerator. The quinoa will keep for up to 5 days, and the chopped vegetables stay fresh for about 3 days.

    Customization Ideas: This recipe is incredibly flexible. I’ve added roasted red peppers, artichoke hearts, pine nuts, and even pomegranate seeds. Let your creativity run wild!

    Serving Suggestions: I love this as a main dish, but it’s also fantastic as a side for grilled fish or chicken. It’s perfect for potlucks too everyone always asks for the recipe.

    Nutritional Benefits That Actually Matter

    Let’s talk about why this bowl is so good for you. Each serving provides approximately:

    • 380 calories
    • 15g protein
    • 12g fiber
    • Healthy omega-3 fatty acids
    • Antioxidants from the colorful vegetables
    • Heart-healthy monounsaturated fats

    But beyond the numbers, this meal provides sustained energy, supports digestive health, and delivers a wide variety of vitamins and minerals. It’s the kind of food that makes you feel genuinely nourished.

    Common Questions I Get About This Recipe

    Q: Can I use regular quinoa instead of tri color? A: Absolutely! Any quinoa works perfectly. I just love the visual appeal of the tri-color variety.

    Q: What if I don’t like tahini? A: Try substituting with a simple lemon-olive oil vinaigrette or even a good quality store-bought Mediterranean dressing.

    Q: How long does this keep? A: Without dressing, the components stay fresh for 3-4 days in the refrigerator. With dressing, it’s best consumed within 24 hours.

    Q: Can I make this vegan? A: Yes! Simply omit the feta cheese or substitute with a plant-based alternative.

    Why This Recipe Works for Busy Lives

    Person eating Mediterranean quinoa power bowl at bright modern kitchen table with natural window light, showing partially eaten healthy meal
    There’s nothing quite like that satisfied feeling when you’re eating something that’s both incredibly delicious AND nourishing for your body. This is what healthy eating should look like – enjoyable and real!

    I know how challenging it can be to maintain healthy eating habits when life gets crazy. This bowl has become my secret weapon because it’s:

    • Quick to prepare (under 30 minutes total)
    • Incredibly satisfying
    • Meal-prep friendly
    • Nutritionally balanced
    • Flexible for different dietary needs

    The reality is, we all need go-to recipes that don’t compromise on nutrition or flavor. This Mediterranean Quinoa Power Bowl has become that recipe for me, and I genuinely hope it becomes the same for you.

    Final Thoughts

    Creating this blog post has reminded me why I fell in love with cooking in the first place it’s about nourishing the people we care about, including ourselves. This bowl represents everything I believe in: fresh, wholesome ingredients prepared simply to let their natural flavors shine.

    I’d love to hear how you customize this recipe for your family. Do you add different vegetables? Try a variation of the dressing? Share your creativity in the comments below—I read every single one and often incorporate your ideas into future recipes.

    Remember, healthy eating doesn’t have to be complicated or boring. Sometimes it’s as simple as combining beautiful, nutritious ingredients in a way that makes your taste buds and your body equally happy.

    Happy cooking, and here’s to your health!

    Pin this recipe for later and follow RecipesAria.com for more healthy, delicious meal ideas that actually work for real life!

    Recipe Card Summary

    Mediterranean Quinoa Power Bowl

    • Prep: 15 minutes
    • Cook: 20 minutes
    • Serves: 4
    • Difficulty: Easy
    • Diet: Vegetarian, Gluten-Free

    Perfect quinoa base topped with fresh Mediterranean vegetables, creamy tahini dressing, and optional protein. A complete, nutritious meal that’s ready in under 30 minutes!

    Keywords: healthy quinoa bowl, Mediterranean diet, vegetarian protein, meal prep, tahini dressing, easy weeknight dinner, superfood recipe

  • Thai Style Chicken Curry: The Ultimate Comfort Food That Actually Loves You Back

    Thai Style Chicken Curry: The Ultimate Comfort Food That Actually Loves You Back

    You know that feeling when you’re craving something rich, warming, and absolutely soul satisfying, but you also want to feel good about what you’re putting in your body? I’ve been there more times than I can count, standing in my kitchen at 6 PM, staring into the fridge with that familiar “what’s for dinner?” panic.

    That’s exactly how I stumbled upon what I now consider the holy grail of weeknight dinners: Thai style chicken curry. And let me tell you, this isn’t your typical heavy, cream laden curry that leaves you feeling sluggish. This is the kind of dish that makes you feel like you’re treating yourself while secretly delivering a powerhouse of nutrition.

    Thai Style Chicken Curry
    Aria Belle

    Thai-Style Chicken Curry

    Discover the ultimate comfort food that actually loves you back! This Thai-style chicken curry is creamy, aromatic, and ready in just 30 minutes. 🍛✨
    Prep Time 15 minutes
    Cook Time 20 minutes
    Total Time 35 minutes
    Servings: 4 servings
    Course: Main Course
    Cuisine: Thai
    Calories: 380

    Ingredients
      

    Protein
    • 2 lbs Boneless, skinless chicken thighs Cut into bite-sized pieces. Thighs stay more tender than breasts.
    Curry Base
    • 1 can (14 oz) Coconut milk Full-fat for the best flavor and creaminess.
    • 2-3 tablespoons Thai red curry paste Start with 2 tbsp, add more for heat. Quality matters here!
    Vegetables
    • 1 medium Red bell pepper Sliced for color and sweetness.
    • 1 cup Green beans Trimmed and cut into 2-inch pieces.
    • 1 medium Medium onion Sliced for flavor base.
    Aromatics
    • 3 cloves Garlic Minced for aromatic base.
    • 1 tablespoon Fresh ginger Grated for warmth and depth.
    Seasonings
    • 1 tablespoon Fish sauce Essential for authentic Thai flavor.
    • 1 tablespoon Brown sugar Balances the heat and acidity.
    • 1 tablespoon Vegetable oil For cooking the curry paste.
    • 2 leaves Kaffir lime leaves Optional but adds authentic citrus aroma.
    Garnish & Serving
    • 1 handful Fresh basil leaves For garnish and fresh flavor.
    • 1 lime Lime wedges Cut into wedges for serving.
    • 2 cups Jasmine rice Cooked, for serving.
    • 1 handful Fresh cilantro Chopped for garnish.
    • to taste Sliced red chilies Optional for extra heat.

    Equipment

    • 1 Large heavy-bottomed pot For cooking the curry.
    • 1 Wooden spoon For stirring ingredients.
    • 1 Cutting Board For prep work.
    • 1 Sharp knife For cutting chicken and vegetables.

    Method
     

    Step 1: Prep Your Ingredients
    1. Here’s my golden rule for curry success: get everything prepped before you start cooking. Trust me on this one – once you start, things move quickly. Cut your chicken into uniform pieces (about 1-inch cubes work perfectly), slice your vegetables, and measure out your spices. This isn’t the time for improvisation!
    Step 2: Build Your Flavor Base
    1. Heat the vegetable oil in a large, heavy-bottomed pot over medium-high heat. Add the curry paste and cook for about 30 seconds until fragrant. You’ll know it’s ready when your kitchen starts smelling like a Thai restaurant. Add the minced garlic and ginger, cooking for another minute until everything smells absolutely incredible.
    Step 3: Brown the Chicken
    1. Add the chicken pieces to the pot and cook for 3-4 minutes, stirring occasionally. You’re not trying to cook them through completely – just get some color on the outside. This step builds flavor that’ll make all the difference in your final dish.
    Step 4: Create the Sauce
    1. Pour in about half the coconut milk (save the rest for later). Add the fish sauce, brown sugar, and lime leaves if you’re using them. Bring everything to a gentle simmer – not a rolling boil, we want this to be gentle and loving to our ingredients.
    Step 5: Add the Vegetables
    1. Toss in your sliced onion and bell pepper. These need about 5 minutes to start softening. Then add the green beans and cook for another 3-4 minutes. The vegetables should be tender but still have some bite – nobody wants mushy curry vegetables.
    Step 6: Finish and Serve
    1. Pour in the remaining coconut milk and let everything simmer together for 5 more minutes. Taste and adjust seasoning – you might want a bit more fish sauce for saltiness, brown sugar for sweetness, or curry paste for heat. Remove from heat and stir in fresh basil leaves. Serve over jasmine rice with lime wedges and fresh herbs. That squeeze of fresh lime juice right before eating? It’s the difference between good curry and mind-blowing curry!

    Why This Curry Changed My Weeknight Game

    I’ll be honest I used to be intimidated by curry. All those spices, the technique, the worry about getting the flavors just right. But here’s what I discovered: Thai Style Chicken Curry is actually one of the most forgiving dishes you can make. The beauty lies in its simplicity and the way the ingredients just seem to understand each other.

    What makes this particular version so special? It’s all about balance. We’re talking tender chicken that practically falls apart with a fork, vegetables that still have some bite, and a sauce that’s creamy without being heavy. The magic happens when coconut milk meets aromatic spices, creating something that’s both exotic and comforting.

    Ingredients You’ll Need

    Thai Style Chicken Curry ingredients arranged on marble surface including coconut milk, curry paste, and fresh vegetables
    Gather these simple ingredients for an authentic Thai Style Chicken Curry experience

    For the Curry:

    • 2 lbs boneless, skinless chicken thighs, cut into bite-sized pieces
    • 1 can (14 oz) coconut milk
    • 2-3 tablespoons Thai red curry paste
    • 1 red bell pepper, sliced
    • 1 cup green beans, trimmed and cut into 2-inch pieces
    • 1 medium onion, sliced
    • 3 cloves garlic, minced
    • 1 tablespoon fresh ginger, grated
    • 1 tablespoon fish sauce
    • 1 tablespoon brown sugar
    • 1 tablespoon vegetable oil
    • 2 kaffir lime leaves (optional)
    • Fresh basil leaves for garnish
    • Lime wedges for serving

    For Serving:

    • 2 cups jasmine rice, cooked
    • Fresh cilantro, chopped
    • Sliced red chilies (optional)

    How to Make Thai Style Chicken Curry

     Cooking curry paste in pot with wooden spoon, showing the cooking process
    The magic starts when curry paste hits the hot oil and releases its incredible aroma

    Step 1: Prep Your Ingredients Here’s my golden rule for curry success: get everything prepped before you start cooking. Trust me on this one once you start, things move quickly. Cut your chicken into uniform pieces (about 1-inch cubes work perfectly), slice your vegetables, and measure out your spices. This isn’t the time for improvisation.

    Step 2: Build Your Flavor Base Heat the vegetable oil in a large, heavy bottomed pot over medium high heat. Add the curry paste and cook for about 30 seconds until fragrant. You’ll know it’s ready when your kitchen starts smelling like a Thai restaurant. Add the minced garlic and ginger, cooking for another minute until everything smells absolutely incredible.

    Step 3: Brown the Chicken Add the chicken pieces to the pot and cook for 3-4 minutes, stirring occasionally. You’re not trying to cook them through completely just get some color on the outside. This step builds flavor that’ll make all the difference in your final dish.

    Step 4: Create the Sauce Pour in about half the coconut milk (save the rest for later). Add the fish sauce, brown sugar, and lime leaves if you’re using them. Bring everything to a gentle simmer not a rolling boil, we want this to be gentle and loving to our ingredients.

    Step 5: Add the Vegetables Toss in your sliced onion and bell pepper. These need about 5 minutes to start softening. Then add the green beans and cook for another 3-4 minutes. The vegetables should be tender but still have some bite nobody wants mushy curry vegetables.

    Step 6: Finish and Serve Pour in the remaining coconut milk and let everything simmer together for 5 more minutes. Taste and adjust seasoning you might want a bit more fish sauce for saltiness, brown sugar for sweetness, or curry paste for heat. Remove from heat and stir in fresh basil leaves.

    How to Serve Thai Style Chicken Curry

    Elegantly plated Thai Style Chicken Curry with rice, lime wedges, and herb garnish
    Serve with lime wedges and fresh herbs for the perfect finishing touch

    This curry is absolutely perfect over steamed jasmine rice the fluffy grains soak up all that incredible sauce. I like to serve it family style with the rice in a big bowl and let everyone help themselves.

    Garnish with fresh cilantro, sliced red chilies if you like heat, and definitely include lime wedges on the side. That squeeze of fresh lime juice right before eating? It’s the difference between good curry and mind blowing curry.

    For a complete meal, I often add a simple cucumber salad or some fresh spring rolls on the side. The cool, crisp elements balance the rich, warm curry beautifully.

    Tips for Curry Success

    Don’t Skip the Curry Paste Quality: I’ve learned this the hard way cheap curry paste makes cheap tasting curry. Invest in a good brand like Mae Ploy or Thai Kitchen. Your taste buds will thank you.

    Chicken Thighs Are Your Friend: While you can use chicken breast, thighs stay more tender and juicy. They’re also more forgiving if you accidentally overcook them.

    Coconut Milk Matters: Use full fat coconut milk for the best flavor and texture. Light coconut milk will work, but you’ll miss some of that luxurious richness.

    FAQs

    Can I make this curry ahead of time? Absolutely! This curry actually tastes even better the next day. The flavors have time to meld together, creating something truly special. Store it in the refrigerator for up to 3 days or freeze for up to 3 months.

    What if I can’t find Thai curry paste? While Thai curry paste gives the most authentic flavor, you can substitute with 1 tablespoon of curry powder mixed with 1 teaspoon of chili garlic sauce. It won’t be exactly the same, but it’ll still be delicious.

    Can I make this vegetarian? Yes! Replace the chicken with firm tofu, extra vegetables, or chickpeas. Use soy sauce instead of fish sauce, and you’ll have a fantastic vegetarian curry.

    How spicy is this curry? Using 2 tablespoons of curry paste gives you a mild to medium heat level. Start with less if you’re sensitive to spice, or add more if you like it hot. You can always add heat, but you can’t take it away.

    What vegetables work best in this curry? While I love the combination of bell peppers and green beans, you can use broccoli, snap peas, baby corn, mushrooms, or zucchini. Just adjust cooking times accordingly harder vegetables need more time, softer ones need less.

    Can I use chicken breast instead of thighs? You can, but be extra careful not to overcook them. Chicken breast can become dry and tough in curry. If using breast meat, add it later in the cooking process.

    The Bottom Line

    Thai style chicken curry isn’t just a recipe it’s a gateway to feeling confident in your kitchen and excited about healthy eating. It’s the kind of dish that makes you realize you don’t need to choose between flavor and nutrition, between comfort and health.

    The next time you’re standing in your kitchen wondering what to make for dinner, remember this curry. It’s waiting to become your new weeknight hero, the dish that makes everyone ask, “Can we have this again tomorrow?”

    Trust me, once you master this Thai Style Chicken Curry, you’ll wonder why you ever stressed about weeknight dinners in the first place. And isn’t that exactly what we all need one less thing to worry about and one more reason to actually look forward to dinner time?

  • The Ultimate Saffron Infused Quinoa Bowl with Truffle Oil: A Gourmet Healthy Recipe

    The Ultimate Saffron Infused Quinoa Bowl with Truffle Oil: A Gourmet Healthy Recipe

    I’ll be completely honest with you I never thought I’d be the type of person to get excited about a quinoa bowl. But here we are, and I’m absolutely obsessed with this saffron infused creation that’s completely revolutionized my approach to healthy gourmet cooking.

    You know that feeling when you discover something so unexpectedly delicious that you actually want to tell everyone about it? That’s exactly what happened when I first made this saffron quinoa bowl. I was skeptical about combining such premium ingredients in what I thought would be just another “healthy bowl,” but the results were nothing short of extraordinary.

    Why This Gourmet Quinoa Bowl Recipe Will Become Your New Obsession

    Let me paint you a picture: fluffy quinoa infused with the most luxurious saffron threads, drizzled with aromatic truffle oil, and topped with vibrant microgreens that add both color and a subtle peppery bite. It’s the kind of dish that makes you feel like you’re dining at a five-star restaurant, except you’re in your own kitchen, wearing your favorite pajamas.

    What sets this recipe apart isn’t just the premium ingredients though they certainly don’t hurt. It’s the way these elements work together to create something that’s both incredibly nutritious and genuinely satisfying. I’ve served this to friends who claim they “don’t like healthy food,” and they’ve gone back for seconds every single time.

    The Magic Behind Saffron in Quinoa Dishes

    Golden saffron threads in white spoon showing the luxury spice used in quinoa recipes
    saffron threads close up golden spice

    Saffron isn’t just expensive for show it brings a complexity to this dish that’s absolutely worth the investment. When you bloom those delicate threads in warm broth, they release this incredible floral, slightly sweet aroma that transforms ordinary quinoa into something truly special.

    I remember the first time I properly used saffron in cooking. I was intimidated by the price, but a chef friend told me something that stuck: “A little saffron goes a long way, and the flavor it brings is irreplaceable.” She was absolutely right. Just a pinch of these golden threads elevates this entire bowl from simple to sophisticated.

    Ingredients for Your Gourmet Saffron Quinoa Bowl

    All ingredients for saffron quinoa bowl recipe laid out including saffron, truffle oil, and fresh vegetables
    saffron quinoa bowl ingredients flat lay

    For the Saffron Quinoa:

    • 1 cup tri color quinoa (or regular quinoa)
    • 2 cups vegetable broth
    • 1/4 teaspoon saffron threads
    • 2 tablespoons warm water
    • 1 tablespoon olive oil
    • 1/2 teaspoon sea salt

    For the Bowl Assembly:

    • 1 cup baby spinach
    • 1/2 cup cherry tomatoes, halved
    • 1/4 cup cucumber, diced
    • 1/4 cup red bell pepper, diced
    • 2 tablespoons pumpkin seeds
    • 1/4 cup crumbled goat cheese
    • 2 tablespoons mixed microgreens
    • 1 tablespoon truffle oil
    • 1 tablespoon lemon juice
    • Fresh herbs (basil, parsley, or cilantro)

    Step by Step Instructions for Perfect Saffron Quinoa

    Preparing the Saffron Infusion

    Here’s where the magic begins. Take those precious saffron threads and gently crush them between your fingers not too much, just enough to release their oils. Drop them into 2 tablespoons of warm water and let them bloom for at least 10 minutes. You’ll watch the water turn this gorgeous golden color, and that’s when you know you’re on the right track.

    Cooking the Quinoa to Perfection

    I’ve made my fair share of mushy quinoa disasters, so trust me when I say this method works every time. Heat the olive oil in a medium saucepan over medium heat. Add the quinoa and toast it for about 2 minutes you’ll hear it start to pop slightly, and it’ll smell nutty and delicious.

    Pour in the vegetable broth, add the saffron mixture (don’t leave any behind!), and bring everything to a boil. Once it’s bubbling away, reduce the heat to low, cover, and let it simmer for 15 minutes. The key is not to lift that lid – I know it’s tempting, but resist!

    After 15 minutes, remove it from heat and let it sit, still covered, for another 5 minutes. Then fluff with a fork, and you’ll have the most perfectly cooked, aromatic quinoa you’ve ever made.

    Assembling Your Masterpiece

    This is where you get to be creative, and honestly, it’s my favorite part. Start with a base of fresh spinach in your bowl I like to use a wide, shallow bowl that shows off all the beautiful colors.

    Add a generous portion of your saffron quinoa right in the center. Then comes the fun part: arranging all those gorgeous toppings. I like to create little sections with the cherry tomatoes, cucumber, and bell pepper. It’s not just about taste this dish needs to look as good as it tastes.

    Sprinkle the pumpkin seeds and crumbled goat cheese over everything. The goat cheese adds this creamy, tangy element that pairs beautifully with the earthy saffron.

    The Truffle Oil Finish: Why It Makes All the Difference

    Now for the pièce de resistance the truffle oil. I’ll admit, I was hesitant about truffle oil for the longest time. It seemed so fancy, so intimidating. But when you drizzle just a tablespoon over this bowl, it brings everything together in the most incredible way.

    The truffle oil adds this rich, earthy depth that complements the saffron without overpowering it. It’s like they were made for each other. Finish with a squeeze of fresh lemon juice to brighten everything up, and top with those delicate microgreens.

    Why This Recipe Works for Special Occasions and Everyday Meals

    What I love most about this dish is its versatility. I’ve served it at dinner parties where it absolutely stole the show, but I’ve also made it for myself on a Tuesday night when I wanted something special but didn’t want to spend hours in the kitchen.

    The prep time is minimal maybe 30 minutes total but the result feels like you’ve spent all day creating something extraordinary. It’s the perfect balance of sophisticated and approachable, healthy and indulgent.

    Nutritional Benefits That Actually Matter

    Let’s talk about why this bowl is doing your body so many favors. Quinoa is a complete protein, which means it contains all nine essential amino acids your body needs. The saffron isn’t just there for flavor it’s loaded with antioxidants and has been shown to support mood and cognitive function.

    The microgreens pack a serious nutritional punch too. They’re concentrated sources of vitamins, minerals, and antioxidants often containing higher levels of nutrients than their mature counterparts. Plus, they add this lovely texture contrast that makes every bite interesting.

    Storage and Meal Prep Tips

    If you’re anything like me, you’re probably thinking about how to make this recipe work for your busy schedule. The good news is that this quinoa bowl is fantastic for meal prep. You can cook a big batch of the saffron quinoa and store it in the refrigerator for up to 5 days.

    Just keep the toppings separate until you’re ready to eat. The quinoa actually tastes even better the next day once all those saffron flavors have had time to meld together. When you’re ready to eat, simply reheat the quinoa slightly, assemble your bowl, and drizzle with the truffle oil.

    Variations to Keep Things Interesting

    Three variations of saffron quinoa bowl recipe with different protein and vegetable toppings

    Once you’ve mastered this base recipe, there are so many ways to make it your own. I love adding roasted vegetables in the fall butternut squash or roasted Brussels sprouts work beautifully. In summer, fresh berries and avocado create this incredible sweet-savory combination.

    For protein lovers, this bowl pairs wonderfully with grilled chicken, salmon, or even a perfectly poached egg on top. The key is to let the saffron quinoa be the star while you play around with complementary flavors.

    The Investment: Why Quality Ingredients Matter

    I won’t lie to you this isn’t the cheapest bowl you’ll ever make. Saffron and truffle oil are investments, but they’re the kind of ingredients that elevate everything they touch. A little goes a long way, and the jars will last you through many, many meals.

    Think of it this way: you’re creating restaurant-quality food at home, and when you break down the cost per serving, it’s still less expensive than ordering something similar from a high end restaurant. Plus, you have complete control over every ingredient.

    Is this saffron quinoa bowl suitable for meal prep?

    Absolutely! This gourmet quinoa bowl is perfect for meal prep. You can prepare the saffron quinoa in advance and store it for up to 5 days in the refrigerator. For more meal prep inspiration, check out our collection of healthy meal prep bowl recipes that will keep your weekly meals exciting and nutritious.

    Can I substitute regular quinoa for tri color quinoa?

    A2: Yes, you can definitely use regular white quinoa! The tri color variety adds visual appeal and slightly different textures, but white quinoa works perfectly. If you’re new to cooking quinoa, our complete quinoa cooking guide will help you achieve perfect results every time.

    Where can I buy high-quality saffron without breaking the bank?

    Look for saffron at specialty spice stores, Middle Eastern markets, or reputable online retailers like The Spice House or Penzeys Spices. A little goes a long way just 1/4 teaspoon can flavor multiple batches of this recipe. According to Bon Appétit’s saffron buying guide, Grade A saffron threads give the best flavor and color.

    What are the health benefits of saffron?

    Saffron is more than just a flavor enhancer! According to WebMD, saffron contains antioxidants that may support mood, memory, and overall wellness. It’s also been used in traditional medicine for centuries. However, always consult with your healthcare provider before using saffron for medicinal purposes.

    Can I make this recipe vegan?

    Absolutely! Simply omit the goat cheese or substitute it with your favorite vegan cheese. You might also enjoy our Mediterranean quinoa bowl recipe which features a delicious tahini dressing and is naturally vegan.

    What’s the difference between real truffle oil and synthetic truffle oil?

    Most commercial truffle oils are made with synthetic truffle flavoring rather than real truffles. Serious Eats explains the difference in detail. While both work for this recipe, real truffle oil provides a more complex, authentic flavor. Look for brands that specifically mention “real truffle” on the label.

    Can I add protein to this quinoa bowl?

    Definitely! This bowl pairs beautifully with grilled chicken, salmon, or even a poached egg. Check out our perfect grilled chicken recipes for techniques that complement the saffron flavors. For vegetarian protein options, try adding chickpeas or hemp seeds.

    How do I know if my saffron is good quality?

    High-quality saffron threads should be deep red with some orange tips, dry but not brittle, and have a sweet, hay-like aroma. According to The Kitchn, avoid powdered saffron or threads that look too uniform, as these may be lower quality or adulterated.

    What other recipes use saffron?

    Saffron is wonderful in many dishes! Try our authentic saffron rice pilaf or browse our luxury ingredients cooking guide for more ways to use premium ingredients in everyday cooking.

    Are microgreens worth the price?

    Microgreens are nutrient dense and add incredible flavor and texture to dishes. According to research published in the Journal of Agricultural and Food Chemistry, microgreens can contain up to 40 times more nutrients than their mature counterparts. Our complete microgreens guide shows you how to grow your own to save money.

    Can I make this recipe without truffle oil?

    While truffle oil adds a luxurious finish, you can substitute it with high-quality extra virgin olive oil and a pinch of garlic powder. However, the truffle oil really makes this dish special. For other gourmet recipes using truffle oil, try our truffle oil pasta recipe.

    What wine pairs well with this saffron quinoa bowl?

    The earthy saffron and rich truffle oil pair beautifully with a crisp white wine like Sauvignon Blanc or a light Pinot Grigio. For more sophisticated pairing ideas, Wine Spectator offers excellent guidance on pairing wines with grain-based dishes.

    How long does cooked saffron quinoa last in the refrigerator?

    Properly stored saffron quinoa will keep for 4-5 days in the refrigerator. Store it in an airtight container and reheat gently with a splash of broth or water. For more storage tips, check our healthy grain bowl recipes collection which includes comprehensive storage guidelines.

    Can I freeze the saffron quinoa?

    Yes! Cooked quinoa freezes well for up to 3 months. Freeze it in portion-sized containers and thaw overnight in the refrigerator. The texture may be slightly different after freezing, but it’s still delicious. This makes it perfect for long-term meal planning.

    What makes this quinoa bowl “gourmet”?

    The combination of premium ingredients (saffron, truffle oil), careful preparation techniques, and thoughtful presentation elevates this from a basic quinoa bowl to a gourmet experience. It’s restaurant-quality food you can make at home! For more elevated home cooking ideas, browse our healthy gourmet recipes collection.

    Final Thoughts: Why This Recipe Changed My Perspective

    This saffron-infused quinoa bowl taught me that healthy eating doesn’t have to mean sacrificing flavor or excitement. It’s proof that you can create something that’s both nourishing and absolutely delicious, something that makes you feel good about what you’re putting in your body while actually looking forward to mealtime.

    The combination of premium ingredients, beautiful presentation, and incredible flavor makes this dish special enough for company but simple enough for a weeknight dinner. It’s the kind of recipe that makes you feel like you’re treating yourself, even while you’re making healthy choices.

    So go ahead, invest in that saffron. Buy the good truffle oil. Your taste buds – and your body will thank you. And who knows? This might just become your new signature dish, the one that has everyone asking for the recipe.

    Have you tried this saffron quinoa bowl? I’d love to hear about your variations and what you think of the flavor combination. Leave a comment below and let me know how it turned out for you!

  • Diet and Mental Health: Can What You Eat Affect How You Feel?

    Diet and Mental Health: Can What You Eat Affect How You Feel?

    Here’s what happened last Tuesday: I’m sitting at my kitchen table at 3 PM, staring at an empty coffee mug and feeling like I’m swimming through mental fog. My energy had crashed after lunch, my mood was somewhere between irritable and defeated, and I couldn’t shake the feeling that my brain was running on fumes. Sound familiar?

    That’s when it hit me I’d been living on sugary snacks, rushed meals, and way too much caffeine. Could what I was eating actually be affecting how I felt mentally? Turns out, the answer is more nuanced than I expected.

    Let me be upfront about something: I’m not a doctor, nutritionist, or mental health professional. I’m just someone who got curious about the connection between food and mood after experiencing those afternoon energy crashes one too many times. What I discovered through research and personal experimentation might surprise you and it definitely changed how I approach both my plate and my mental well being.

    The Food Mood Connection: What We Actually Know

    Hands holding warm tea mug with Diet and Mental Health
    Small dietary changes can be part of a comprehensive approach to mental wellness

    Here’s the thing about nutrition and mental health research it’s fascinating, but it’s also complicated. While we have compelling evidence that diet can influence mood, energy, and even symptoms of anxiety and depression, most studies are still relatively small or observational. We’re not talking about miracle cures here; we’re talking about one important piece of a much larger mental health puzzle.

    That said, what we do know is pretty interesting. Your gut produces about 90% of your body’s serotonin that’s the neurotransmitter often called the “happiness hormone.” Your brain and gut are constantly communicating through what scientists call the gut brain axis. When you eat, you’re not just feeding your body; you’re potentially influencing your mental state too.

    The research suggests that certain eating patterns, particularly those rich in whole foods, omega-3 fatty acids, and fermented foods, may support better mental health outcomes. But here’s what I want to emphasize: diet is one tool in the mental health toolbox, not a replacement for professional help, therapy, or medication when needed.

    Foods That May Support Mental Wellness

    Omega-3 rich foods including salmon, walnuts, chia seeds, and sardines arranged on marble surface
    Omega-3 fatty acids found in fish, nuts, and seeds may help reduce brain inflammation

    After diving into the research and experimenting with my own eating habits, I’ve identified several categories of foods that seem to make a difference in how I feel mentally. Remember, everyone’s body is different, but these are backed by at least some scientific evidence:

    Omega-3 Rich Foods

    Fatty fish like salmon, sardines, and mackerel contain omega-3 fatty acids that may help reduce inflammation in the brain. Some studies suggest these fats might help with depression and anxiety symptoms, though the evidence is still developing. If you’re not a fish person, walnuts, flaxseeds, and chia seeds are plant-based options.

    Fermented Foods

    Various fermented foods including yogurt, sauerkraut, kimchi, and kombucha arranged for healthy gut bacteria
    Fermented foods provide probiotics that support the gut-brain connection

    Yogurt, kefir, sauerkraut, kimchi, and kombucha contain probiotics that may support gut health and remember, your gut health is connected to your brain health. I started adding a small serving of plain Greek yogurt to my breakfast routine, and while I can’t prove causation, I do feel more mentally balanced on days when I include these foods.

    Complex Carbohydrates

    Whole grains, sweet potatoes, and legumes provide steady energy and may help with serotonin production. Unlike simple sugars that cause energy spikes and crashes, complex carbs give your brain a more consistent fuel source. I noticed a huge difference when I switched from sugary afternoon snacks to an apple with almond butter.

    Antioxidant-Rich Foods

    Berries, dark chocolate, green tea, and colorful vegetables contain compounds that may protect your brain from oxidative stress. The research on antioxidants and mental health is still emerging, but eating a variety of colorful foods certainly doesn’t hurt.

    Brain-Healthy Snacks You Can Actually Make

    Let me share some simple snack ideas that I’ve found helpful for maintaining steady energy and mood throughout the day. These aren’t miracle cures, but they’re practical options that support stable blood sugar and provide nutrients your brain needs:

    Mood-Boosting Trail Mix

    Three brain-healthy snacks: trail mix, green smoothie, and avocado toast with egg
    Simple snacks that provide steady energy and brain-supporting nutrients

    Ingredients:

    • 1 cup walnuts (omega-3s)
    • 1/2 cup pumpkin seeds (magnesium)
    • 1/4 cup dark chocolate chips (antioxidants and a mood boost)
    • 1/2 cup dried berries (antioxidants)

    Instructions: Mix everything together and store in an airtight container. Keep portions to about 1/4 cup – this is calorie dense but nutritious.

    Stress-Fighting Smoothie

    Ingredients:

    • 1 cup spinach (folate)
    • 1/2 banana (potassium and natural sweetness)
    • 1/2 cup Greek yogurt (probiotics)
    • 1 tablespoon almond butter (healthy fats)
    • 1/2 cup unsweetened almond milk
    • 1 tablespoon chia seeds (omega-3s)

    Instructions: Blend everything until smooth. The spinach is virtually tasteless, but adds folate, which some studies suggest may help with mood regulation.

    Simple Avocado Toast Plus

    Ingredients:

    • 1 slice whole grain bread
    • 1/2 ripe avocado (healthy fats)
    • 1 hard-boiled egg (protein and choline)
    • Everything bagel seasoning
    • Optional: a few drops of hot sauce

    Instructions: Toast bread, mash avocado on top, add sliced egg and seasonings. This combination provides steady energy without the crash.

    The Reality Check: What Diet Can and Cannot Do

    Person meal prepping healthy snacks in glass containers in bright kitchen
    lanning ahead makes it easier to choose brain-healthy options during busy days

    I want to be completely honest with you about something: changing my diet didn’t cure my stress or eliminate difficult emotions. What it did do was give me more stable energy, fewer mood crashes, and a general sense that I was taking care of myself in a meaningful way.

    Diet is like sleep, exercise, and social connection it’s one important pillar of mental wellness, but it’s not the whole building. If you’re dealing with persistent anxiety, depression, or other mental health challenges, please consider talking to a healthcare provider. Food can be part of your self care toolkit, but it’s not a replacement for professional support when you need it.

    Practical Tips for Getting Started

    Here’s what I’ve learned about making realistic changes:

    Start small: Don’t overhaul your entire diet overnight. Try adding one brain-healthy snack to your day or swapping one processed food for a whole food option.

    Pay attention to timing: I noticed that eating protein with breakfast helped me feel more mentally sharp throughout the morning. Experiment with when you eat certain foods and notice how you feel.

    Stay hydrated: Even mild dehydration can affect mood and concentration. I keep a water bottle at my desk and aim for consistent sips throughout the day.

    Plan for tough days: When I’m stressed or overwhelmed, I’m more likely to reach for comfort foods. Having healthy options ready makes it easier to nourish myself even when life gets chaotic.

    Key Takeaways

    • The gut brain connection is real, but research is still evolving
    • Omega-3s, probiotics, complex carbs, and antioxidants may support mental wellness
    • Stable blood sugar helps with mood stability
    • Diet is one tool for mental health, not a cure-all
    • Small, sustainable changes are more effective than dramatic overhauls
    • Professional help is important for persistent mental health challenges

    Moving Forward: Your Mental Health Toolkit

    As I finish writing this, I’m snacking on that trail mix I mentioned earlier, and I’m reminded of something important: taking care of your mental health isn’t about perfection. It’s about having multiple tools available and using them consistently.

    Some days, I eat the perfect brain-healthy breakfast and feel amazing. Other days, I survive on coffee and crackers because life is messy. Both are okay. The goal isn’t to achieve some ideal of perfect nutrition it’s to develop a sustainable relationship with food that supports your overall well-being.

    What matters most is that you’re paying attention to how different foods make you feel and making choices that support your mental health alongside other important practices like adequate sleep, movement, social connection, and professional support when needed.

    Important note: This information is for educational purposes only and is not intended to replace professional medical advice. If you’re experiencing persistent mental health symptoms, please consult with a healthcare provider or mental health professional.

    FAQ About Diet and Mental Health

    Can changing my diet really improve my mental health?

    While diet alone isn’t a cure for mental health conditions, research suggests that certain foods may support brain health and mood regulation. The gut-brain axis research shows promising connections between nutrition and mental wellness. However, it’s important to work with mental health professionals for comprehensive care.

    Which foods are best for brain health?

    Foods rich in omega-3 fatty acids (like salmon and walnuts), antioxidants (berries and dark chocolate), and probiotics (yogurt and fermented foods) show the most promise. Try our omega-3 rich chia pudding or probiotic-rich yogurt parfait for easy ways to include these nutrients.

    How quickly will I notice changes in my mood from dietary changes?

    Individual responses vary significantly. Some people report feeling more energized within days, while others may notice gradual changes over weeks or months. Nutrition research suggests that consistent dietary patterns matter more than short-term changes.

    Are there foods I should avoid for better mental health?

    Highly processed foods, excessive sugar, and too much caffeine can contribute to energy crashes and mood swings. Focus on whole foods and stable blood sugar rather than strict elimination. Our nutrient-dense smoothie bowl is a great alternative to sugary breakfast options.

    Can diet help with anxiety and depression?

    Some studies suggest that certain dietary patterns may help manage symptoms, but diet should complement, not replace, professional treatment. The Mayo Clinic discusses how nutrition can be part of a comprehensive approach to mental health.

    What if I’m on a restricted diet (keto, vegan, etc.)?

    Brain-healthy eating can be adapted to most dietary restrictions. For example, try our keto-friendly avocado chicken salad or plant-based options like protein-packed chickpea salad. Consult with a registered dietitian for personalized guidance.

    How much does gut health really affect mental health?

    The gut produces about 90% of the body’s serotonin, and emerging research on the gut-brain axis suggests a strong connection. Including fermented foods and fiber-rich options can support gut health, which may positively impact mood.

    Should I take supplements instead of changing my diet?

    While supplements can be helpful, whole foods provide nutrients in forms that are often better absorbed and utilized by the body. Focus on food first, then consider supplements under professional guidance. Harvard’s nutrition experts recommend a food-first approach.

    Where can I get professional help for mental health concerns?

    If you’re experiencing persistent mental health symptoms, reach out to healthcare providers, therapists, or counselors. Resources like NIMH and NAMI provide excellent starting points for finding professional support.

    Ready to Experiment?

    Try making one of the brain-healthy snacks mentioned above this week. Pay attention to how you feel after eating it both immediately and a few hours later. Notice any changes in your energy, mood, or concentration.

    I’d love to hear about your experience! What foods make you feel mentally sharp and energized? What recipes would you like to see more of? Share your thoughts and let’s continue this conversation about nourishing both body and mind.

  • Green Tea with Lemon: A Daily Ritual That Sharpens the Mind and Nourishes the Body

    Green Tea with Lemon: A Daily Ritual That Sharpens the Mind and Nourishes the Body

    There’s something wonderfully grounding about starting the day with a warm, citrus-kissed cup of green tea with lemon. For me, it became more than just a drink it turned into a calming ritual that gently nudged my focus into gear. Over time, I noticed less brain fog, steadier energy, and even improved digestion. Turns out, there’s real science behind the soothing blend of green tea with lemon. Here’s what it can do for your mind and body.

    1. It Enhances Brain Function

    Green tea has long been praised for its ability to boost cognitive performance not through a surge of caffeine, but through the synergy of its natural compounds. L-theanine and a moderate dose of caffeine work together to promote alertness without the jitters, helping you stay focused and mentally sharp throughout the day.

    Drinking it with lemon only adds to the clarity. The vitamin C in lemon supports neurotransmitter function and may even help reduce oxidative stress in the brain a key factor in long term mental well-being.

    In short: A cup in the morning may help you think clearer, react faster, and stay calmly focused.

    2. It Delivers a Powerful Dose of Antioxidants

    Green tea and lemon boosting brain clarity
    This drink may help sharpen focus and support cognitive performance

    Both green tea and lemon are antioxidant rich a powerhouse pairing for fighting free radicals. The star of green tea, EGCG (epigallocatechin gallate), is known for its strong anti-inflammatory and cell protective properties. But here’s the twist: lemon helps your body absorb more of those beneficial compounds.

    By adding lemon, you’re not just improving the flavor you’re helping your body make better use of green tea’s most valuable nutrients.

    In short: This duo helps your body combat daily cellular stress, from pollution to poor sleep.

    3. It May Support Healthy Weight Loss

    If you’re aiming for a metabolism boost without relying on harsh stimulants, green tea with lemon is a gentle ally. Studies suggest green tea can slightly raise the number of calories your body burns, especially when paired with movement or meals. The caffeine helps mobilize fat from cells, while lemon adds hydration support and digestion aid.

    It’s not a magic solution, but as part of a consistent routine, it can subtly support weight management efforts.

    In short: This daily drink may help your metabolism hum along more efficiently naturally.

    Ingredients

    Green tea bag, lemon slices, honey, and loose tea on a kitchen counter
    Everything you need to make a refreshing cup of green tea with lemon
    • 1 green tea bag (or 1 teaspoon loose leaf green tea)
    • 1 cup (about 240 ml) hot water (not boiling — around 80°C / 175°F)
    • 1–2 teaspoons fresh lemon juice (or 1 lemon wedge)
    • Optional: 1 teaspoon raw honey or a slice of fresh ginger

    4. It Supports Heart Health

    The antioxidants in green tea may help lower LDL cholesterol and improve blood flow, both of which are protective factors for heart health. Lemon contributes potassium and vitamin C, which are also associated with better cardiovascular function.

    Together, they form a drink that’s as kind to your arteries as it is to your tastebuds.

    In short: This combo may gently lower heart disease risk when enjoyed regularly.

    5. It Strengthens the Immune System

    A warm cup of green tea with lemon isn’t just cozy it’s quietly reinforcing your immune defenses. Lemon is rich in vitamin C, known for supporting immune cells, while green tea may enhance your body’s response to inflammation and microbial threats.

    If you tend to reach for this blend during flu season, you’re on the right track.

    In short: A soothing sip that works behind the scenes to help your immune system stay resilient.

    6. It Aids Digestion

    This is one of the first things I noticed when I made the switch. Drinking green tea with lemon after a meal feels like a digestive reset. Green tea has gentle compounds that may support gut function and ease bloating, while lemon stimulates digestive juices and bile production.

    The result? Less sluggishness after meals and a more settled stomach.

    In short: Your gut might thank you after a few days of this ritual.

    7. It May Help Prevent Kidney Stones

    Lemon is a natural source of citrate, which can help reduce the formation of certain types of kidney stones. Green tea, surprisingly, may also lower the risk of kidney related issues thanks to its antioxidant profile.

    Although not a replacement for medical advice, this combo can be part of a kidney-friendly lifestyle.

    In short: Regular sips may help keep your kidneys running clean and smooth.

    8. It May Offer Cancer Fighting Compounds

    Some of green tea’s most compelling research surrounds its potential role in cancer prevention. Antioxidants like EGCG have been studied for their ability to limit tumor growth in laboratory settings. Lemon brings its own share of flavonoids that may also offer protection against cell damage.

    While more human studies are needed, this drink holds quiet promise.

    In short: Green tea and lemon deliver compounds that may guard your cells over time.

    9. It Helps Keep You Hydrated

    Hydration affects everything from mood to memory to muscle function. While caffeine gets a bad reputation for being dehydrating, green tea’s low levels, combined with water and lemon, make it an excellent hydrating choice. It’s especially helpful for those trying to drink more water without turning to sugary drinks.

    In short: A flavorful way to hydrate your body and keep systems in balance.

    10. It’s Easy to Make and Easy to Love

    One of the best things about green tea with lemon is how effortlessly it fits into your day. Boil water, steep the tea, and squeeze in fresh lemon. Add a little honey or ginger if you like. You can enjoy it hot on chilly mornings or iced in summer with mint or cucumber for a spa like touch.

    It’s low effort, high reward exactly the kind of habit that sticks.

    In short: A soothing, versatile ritual that takes just minutes to prepare.

    The Bottom Line

    Green tea with lemon isn’t just trendy it’s a timeless wellness habit with real benefits. From mental clarity to immune support, it’s a drink that respects your time and nourishes your whole system. If you’re looking to build a healthier routine, this is one of the simplest places to start.

    So tomorrow morning, before you reach for that usual cup of coffee, consider giving your mind and body a gentler kind of energy.

    Who knows it might just become your favorite new ritual.

  • Anti Inflammatory Chicken Fajita Soup: Your Body’s Perfect Evening Reset

    Anti Inflammatory Chicken Fajita Soup: Your Body’s Perfect Evening Reset

    The 6 PM Question That Changed Everything

    Picture this: You’re staring into your fridge at 6 PM, exhausted from the day, and your body is practically begging you to order takeout. But here’s what I learned during my years analyzing food with medical professionals your body isn’t asking for more food. It’s asking for the RIGHT food at the RIGHT time.

    This is the story of how one simple soup became my evening game-changer.

    A warm bowl of chicken fajita soup with sliced bell peppers, shredded chicken, and golden turmeric broth, garnished with cilantro and lime, photographed in soft evening light.
    Aria Belle

    Anti-Inflammatory Chicken Fajita Soup

    A healing anti-inflammatory chicken fajita soup perfectly timed for evening consumption. Reduces inflammation, supports digestion, and promotes better sleep quality. 🍲⏰
    Prep Time 15 minutes
    Cook Time 25 minutes
    Total Time 40 minutes
    Servings: 4 servings
    Course: Dinner
    Cuisine: Mexican-Inspired”
    Calories: 285

    Ingredients
      

    Protein
    • 2 lbs Boneless Chicken Thighs Cut into strips. Thighs are more tender and easier to digest in the evening.
    Vegetables
    • 1 large Red Bell Pepper Sliced. Rich in vitamin C and antioxidants that calm daily inflammation.
    • 1 large Yellow Bell Pepper Sliced. Natural sweetness satisfies evening cravings without sugar crashes.
    • 1 large Green Bell Pepper Sliced. Adds vibrant color and additional anti-inflammatory compounds.
    • 1 whole Large Onion Sliced. Provides quercetin, a powerful anti-inflammatory compound.
    • 3 cloves Garlic Cloves Minced. Contains allicin which supports evening immune function.
    Healing Spices
    • 1 tsp Ground Cumin Aids digestion and adds warm, earthy flavor perfect for evening.
    • 1 tsp Paprika Rich in antioxidants and provides beautiful color.
    • 1/2 tsp Turmeric The golden warrior that actively reduces inflammation at cellular level.
    • 1/4 tsp Cayenne Pepper Optional. Boosts circulation and metabolism gently for evening.
    • 1 inch Fresh Ginger Grated. Helps process the day’s stressors and prepares body for rest.
    Liquid Base
    • 6 cups Bone Broth Or high-quality chicken broth. Provides collagen and minerals for gut healing.
    • 1 can (14.5 oz) Diced Tomatoes Adds lycopene and natural acidity to balance flavors.
    Finishing Touches
    • 1 whole Lime Juiced. Enhances nutrient absorption and adds bright freshness.
    • 1 bunch Fresh Cilantro For garnish. Aids in detoxification during overnight repair.
    • 2 tbsp Olive Oil For cooking. Provides healthy fats for nutrient absorption.
    • to taste Salt To taste. Enhances all flavors and supports proper hydration.
    • to taste Black Pepper To taste. Increases turmeric absorption and adds gentle heat.

    Method
     

    Step 1: Create Your Evening Base
    1. Heat olive oil in a large pot over medium heat. Add sliced onion and cook for 3-4 minutes until softened and translucent. This slow start helps your body begin transitioning from day to evening mode.
    Step 2: Build the Healing Foundation
    1. Add minced garlic, cumin, paprika, turmeric, grated ginger, and cayenne (if using). Stir and cook for 30 seconds until fragrant and aromatic. The warming spices will signal your nervous system to start relaxing.
    Step 3: Add the Protein
    1. Add chicken strips to the pot and cook for 5-6 minutes, stirring occasionally, until just cooked through and no longer pink. The gentle cooking preserves the protein’s digestibility.
    Step 4: Incorporate the Colorful Vegetables
    1. Add all bell peppers (red, yellow, and green) to the pot. Cook for 3-4 minutes until slightly softened but still vibrant. We want to preserve their anti-inflammatory compounds and natural crunch.
    Step 5: Create the Liquid Medicine
    1. Pour in bone broth and diced tomatoes with their juices. Bring to a gentle simmer (not a rolling boil – this matches your body’s evening energy). Let simmer for 8-10 minutes to allow flavors to meld beautifully.
    Step 6: Season and Balance
    1. Taste and season with salt and pepper as needed. The soup should be well-balanced and comforting – perfect for your body’s evening needs.
    Step 7: The Final Healing Touch
    1. Remove from heat and stir in fresh lime juice. The citrus helps with nutrient absorption while cilantro aids in detoxification – perfect for your body’s overnight repair work. Ladle into bowls and garnish generously with fresh cilantro.
    Step 8: Serve with Intention
    1. Serve hot but not scalding between 6-8 PM when your body is naturally transitioning to repair mode. Eat slowly, putting your spoon down between bites to allow proper digestion and satisfaction.

    Why Your Body Craves This at Sunset

    Infographic showing circadian rhythm waves with evening nutrition timing, surrounded by anti-inflammatory ingredients like turmeric and ginger
    Your body’s natural rhythms determine when anti inflammatory foods work best evening meals should support repair mode.

    The Science Moment: By evening, your body shifts from active metabolism to repair mode. Your cortisol drops, your digestive fire slows, and inflammation from the day needs to be quieted. This isn’t the time for heavy, complex meals it’s time for gentle, healing nutrition.

    That’s where this anti inflammatory chicken fajita soup comes in. It’s like a warm hug for your tired system, packed with ingredients that work WITH your body’s natural evening rhythms.

    The Magic Timing Formula

    Morning Version: Too heavy would overwhelm your awakening digestive system
    Midday Version: Good, but your body wants more activation energy
    Evening Version: PERFECT supports your body’s natural wind down process

    The Anti-Inflammatory Powerhouse Ingredients

    Chicken (The Gentle Protein)

    • Why It Works: Easily digestible protein that won’t stress your evening digestion
    • The Timing Factor: Provides amino acids for overnight muscle repair without the heaviness of red meat

    Bell Peppers (The Inflammation Fighter)

    • Why It Works: Loaded with vitamin C and antioxidants that calm daily inflammation
    • The Timing Factor: Their natural sweetness satisfies evening cravings without sugar crashes

    Turmeric & Ginger (The Healing Duo)

    • Why It Works: These golden warriors actively reduce inflammation at the cellular level
    • The Timing Factor: Help your body process the day’s stressors and prepare for restorative sleep

    Bone Broth Base (The Gut Healer)

    • Why It Works: Collagen and minerals that repair your digestive lining
    • The Timing Factor: Warm, soothing liquid that signals your body it’s time to relax

    For another healing recipe that uses broth as a gut-soothing base, try our Broccoli Chicken Cheese Casserole: The Ultimate Comfort Dish.

    The Recipe That Heals

    Ingredients (Serves 4)

    Flat lay of anti-inflammatory chicken fajita soup ingredients including chicken thighs, colorful bell peppers, turmeric, ginger, and bone broth arranged in a circle
    Each ingredient is chosen for its anti-inflammatory properties and compatibility with evening digestion.
    • 2 lbs boneless chicken thighs, cut into strips
    • 1 red bell pepper, sliced
    • 1 yellow bell pepper, sliced
    • 1 green bell pepper, sliced
    • 1 large onion, sliced
    • 3 cloves garlic, minced
    • 1 tsp ground cumin
    • 1 tsp paprika
    • 1/2 tsp turmeric
    • 1/4 tsp cayenne pepper (optional)
    • 1 inch fresh ginger, grated
    • 6 cups bone broth (or high-quality chicken broth)
    • 1 can diced tomatoes
    • 1 lime, juiced
    • Fresh cilantro for garnish
    • 2 tbsp olive oil
    • Salt and pepper to taste

    The Evening Preparation Ritual

    Step-by-step cooking process showing sautéing onions, adding spices, cooking chicken and peppers, and simmering the final soup
    The gentle cooking process preserves nutrients while creating a soothing evening meal that supports your body’s natural rhythms.

    Step 1: Create Your Base (5 minutes) Heat olive oil in a large pot over medium heat. Add onion and cook until softened. This slow start helps your body begin transitioning from day to evening.

    Step 2: Build the Flavor Foundation (5 minutes) Add garlic, cumin, paprika, turmeric, and ginger. Let them bloom for 30 seconds. The aroma alone will signal your nervous system to start relaxing.

    Step 3: Add the Healing Elements (10 minutes) Add chicken strips and cook until just done. Add bell peppers and cook until slightly softened but still vibrant. Remember we’re not cooking the life out of our vegetables.

    Step 4: Create the Liquid Medicine (5 minutes) Pour in bone broth and diced tomatoes. Bring to a gentle simmer. This isn’t a rolling boil it’s a peaceful bubble that matches your body’s evening energy.

    Step 5: The Final Touch Add lime juice and fresh cilantro. The citrus helps with nutrient absorption, while cilantro aids in detoxification perfect for your body’s overnight repair work.

    The Aria Serving Secret

    Portion Philosophy: Your evening portions should be satisfying but not overwhelming. Think “comfortably full” not “need to unbutton pants.”

    The 20-Minute Rule: Eat slowly and put your spoon down between bites. Your body needs time to register satisfaction in the evening.

    Temperature Matters: Serve it hot but not scalding. Your digestive system is winding down and doesn’t want to be shocked.

    Why This Works Better Than Any Takeout

    Unlike the heavy, sodium loaded alternatives, this soup:

    • Reduces inflammation instead of creating it
    • Provides nutrients your body can actually use for overnight repair
    • Satisfies your comfort food cravings without the 9 PM energy crash
    • Supports better sleep quality through proper evening nutrition

    The Reader Results

    “I made this last Tuesday and slept better than I had in weeks. My body felt so calm after eating it!” – Sarah M.

    “Finally, a recipe that doesn’t leave me feeling heavy at bedtime. This is going into my weekly rotation.” – Mike T.

    Your Next Step

    Try this recipe this week, but here’s the key: eat it between 6-8 PM when your body is naturally transitioning to evening mode. Pay attention to how you feel not just while eating, but how you sleep and wake up the next morning.

    Your body will thank you for working with its natural rhythms instead of against them.

    The Aria Promise

    Every recipe I share follows this same principle: the right food at the right time for your body’s optimal function. This isn’t just cooking it’s chronobiology in action.

    What’s your biggest evening eating challenge? Drop a comment below and let’s solve it together.

    Posted by Aria Atolt | Cook Time: 25 minutes | Best Time: 6-8 PM

    Want more recipes timed for your body’s natural rhythms? Follow me for chrononutrition cooking that transforms how you feel, not just what you eat.